This December is going to be Dreamcast Conversion’s ninth anniversary. Can you imagine?
For earlier versions of the mod, I would play SA1 on the emulator and the PC version of SADX side by side, looking for as many differences as I could find, and trying to replicate them. By “replicate” I mean trying to recreate them manually without knowing how they worked in the original game, and making SADX do something that looks the same (or, in some rare cases, “close enough”). This approach worked well for visual accuracy (such as the title screen), and eventually, when I found out or realized how things worked, I would implement more faithful versions. This is what happened with the SA1 title screen, which was originally just a bunch of animated textures, and later a real model taken from SA1 and animated using the code from the X360 prototype. Or, more recently, the plasma cylinders in Final Egg.
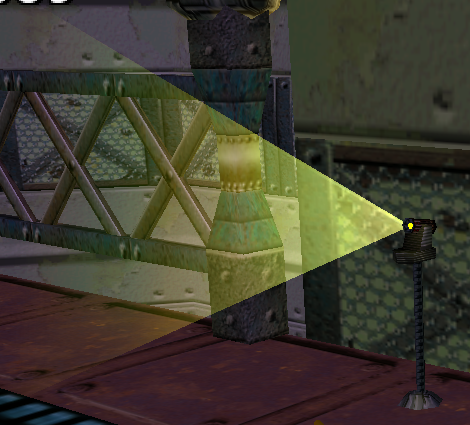
There are still some things in SA1 that I couldn’t understand or reproduce by just looking at them, and today brings us to the conclusion of another 8-year-old mystery. Let me introduce one of the oldest issues on Dreamcast Conversion’s issue tracker: the so-called stand light in Final Egg.
From a quick look it seems pretty innocuous. What could possibly be so difficult about it? It’s just a pole with a bright triangular light beam.
As you walk around, you may notice a couple of interesting things. For each individual object the beam has different length and width. It also has an effect that looks somewhat similar to a billboard, but not quite. The light looks mostly the same from different angles, except that it “flips” when it’s looking directly at the camera. Here is a video of the effect in action (30MB file warning: might take a while to load):
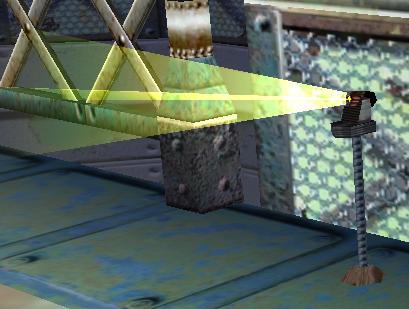
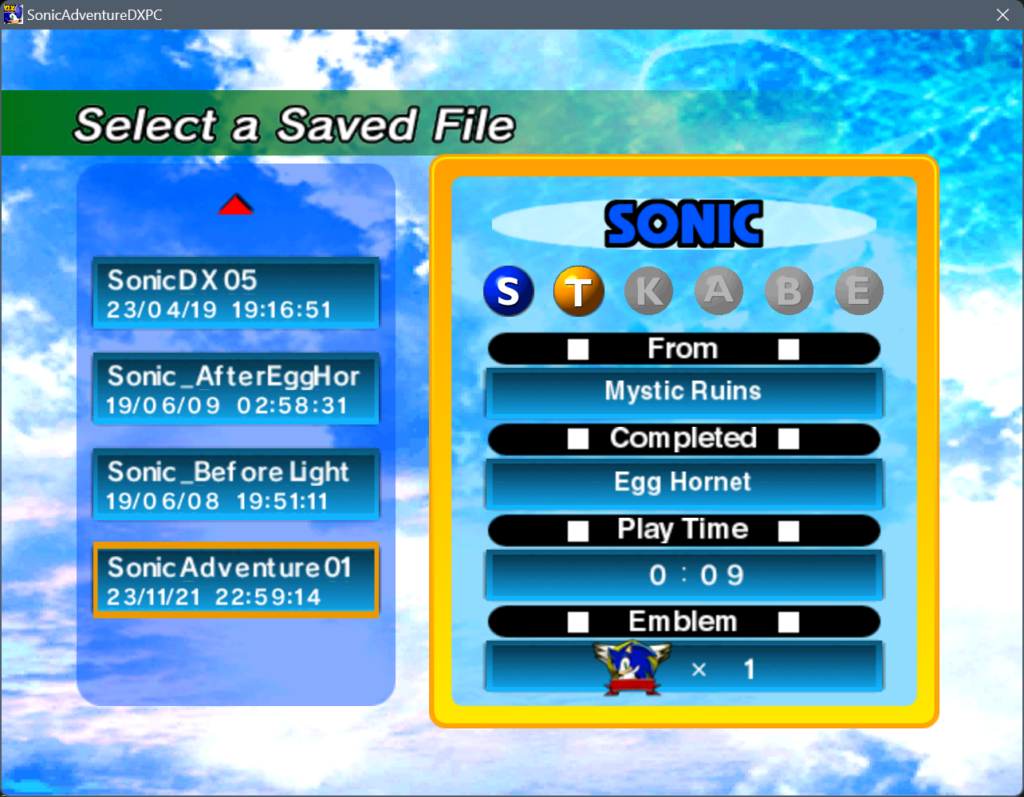
Now let’s see what the object looks like in SADX:
In the ports, all instances of this object share the same beam, and there is no adjustment to its width or length. However, this beam consists of two flat parts, which makes it look odd. It doesn’t rotate in any way, so it appears like two flat surfaces perpendicular to each other.
Figuring out how to get beam length and width wasn’t difficult: they’re stored in the SET object’s scale values. I even made the game hide either the “horizontal” or the “vertical” part of the SADX beam, and make the remaining beam wider or longer depending on what object it was. However, all my attempts to get the light to rotate like in the original game were unsuccessful. It looked “good enough” for the most part, but it just wasn’t accurate. Back when Ghidra wasn’t released yet, trying to figure out what the Dreamcast version does in code was out of the question (at least for me), so I just did the best I could and left the issue hanging, hoping to figure it out someday.
After Ghidra’s SH4 decompiler became available, the perspective of decompiling the Dreamcast version of the effect became more realistic. Of course I still suck at Ghidra, and its pseudocode is still a mystery to me. However, with people like woofmute and Exant being in the scene, it seemed like it would be worth a try.
The first attempt to understand what this object did dates back all the way to 2020, when Exant started looking into it. We had no idea how deep the rabbit hole goes. Originally, because the weird two-sided beam is part of the model in both the DC and DX versions, I assumed the DC version simply removed one side of it for rendering. However, it turns out the DC version doesn’t use the beam model at all, and instead draws it using one of the “wide line” functions. The “wide lines” are still used in SADX, though rarely, to draw such things as the “crush light” (the beam effect when the E-series robots explode), as well as some effects in ZERO and E101R boss fights (some of which have billboarding issues on PC, but that’s a story for another post). However, the function that draws the Final Egg beams takes an angle argument, and none of the functions in the PC versions can do that. Exant tried to recreate that function, but at that point in time it didn’t work, and we gave up.
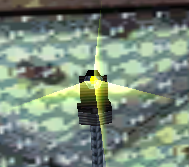
The second attempt, which happened just a few days ago, was much more successful. Using code from a damaged X360 prototype that had unused functions compiled into it as a reference and adding missing bits from decompiled code from the Dreamcast version, Exant reconstructed the version of “draw wide line 3D” that we needed in addition to a matching decompilation of the object’s functions (and adjustment for different resolutions rather than just 640×480). After a lot of tinkering, it was finally there:
As you can see, the original code still needed some adjustments for the beam to look good in SADX, so I did some of the usual transparency shenanigans with blending modes and queuing it for drawing with a custom callback. As I was getting ready to release a new update for Dreamcast Conversion, I noticed something strange… Maybe the math was wrong somewhere?
It took us a while to figure out what was going on because Exant couldn’t reproduce it at first, and some time later I couldn’t reproduce it consistently either. Finally we realized that it behaved differently in DirectX 8 and DirectX 9 modes, as well as between nVIDIA and Intel GPUs. It appears that some GPU drivers implement T&L vertex clipping (indicated by the D3DPMISCCAPS_CLIPTLVERTS capability) differently, so some people might get that glitch and some wouldn’t. Exant proposed two workarounds that made the glitch less visible and I was personally happy with them. The near-final result looked good enough to me.
However, there was also the idea to use the function D3DXVec3Unproject to undo the screen space calculations and prevent the glitchy projection from happening in the first place. This worked even better, and the effect is now glitch-free on any GPU without workarounds while staying faithful in its looks to the Dreamcast original.
I had no idea how involved recreating this effect was, and I’d like to thank Exant for resolving another long-standing mystery of SA1 vs SADX differences. The updated version of the object is now in Dreamcast Conversion.
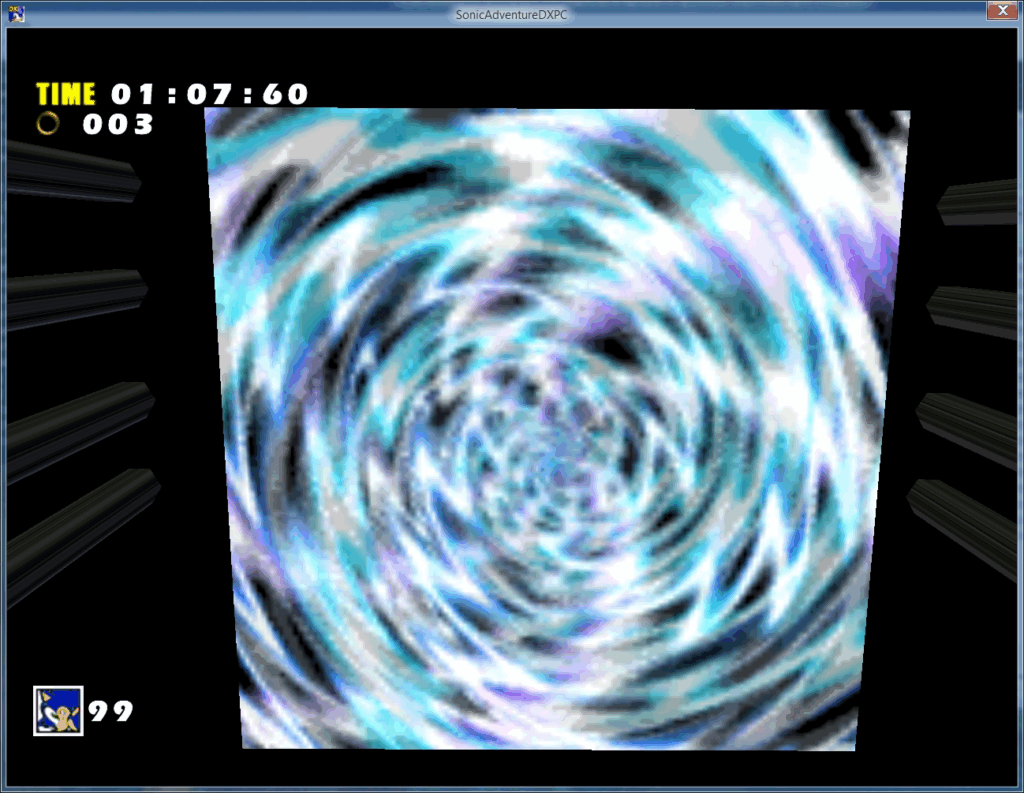
If you’re into all things SA1, you probably know about the plasma texture effect in Final Egg. It appears on spinning cylinders and traps, and looks like this:
Like many other cool things, the effect was removed in the Gamecube version and later ports. Instead, there’s a simple 6-texture animation that looks a bit awkward:
Of course I wanted to restore it in Dreamcast Conversion. However, the textures for this effect aren’t in any PVMs. For a long time we had no idea how it works in the original game. After the first release of Dreamcast Conversion in December 2016, I talked to SonicFreak94 about the possibility of recreating this effect, and he suggested trying environment mapping. If you have played earlier releases of Dreamcast Conversion, you may have seen our first attempt at it. It was made by SonicFreak94 and it wasn’t compatible with Lantern Engine, so you had to pick between lighting and this effect. Still, I think it looks decent for what it was. Don’t you think?
That said, I was hoping to figure out a more faithful solution, and to make it compatible with Lantern Engine. Since I didn’t know how the effect actually worked, I decided to fake it by capturing a video of it and making a texture animation.
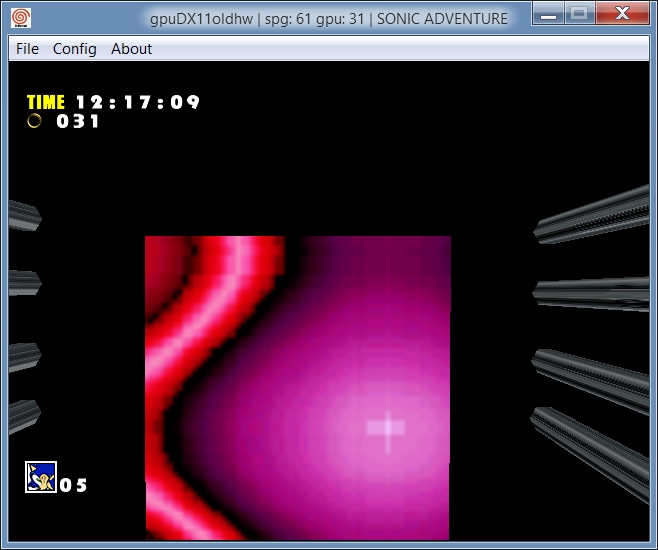
Besides spinning cylinders (OTatekan), this effect is also applied on a flat object (OTexture) that can be seen at the bottom of pits in Act 3. Since that object is just a flat surface, it can be used to look at the effect more clearly. By editing the SET file, I was able to put an OTexture on a black background, point the first-person camera at it and capture the effect in the crudest way possible:
For comparison, here’s the same object in SADX (the size is actually the same, it looks bigger because of a different position against the camera):
Although nowhere near efficient, this approach let me put together the following texture animation. It looked a lot more complex than we originally thought.
Although the texture could now be used in Dreamcast Conversion, seeing this left more questions than answers. How could this effect be achieved? Some kind of texture palette manipulation? Abuse of the Dreamcast’s GPU features? Was that why it was removed in SADX? Although I didn’t have any answers at that point, at least I had the texture to put in the game. I think it turned out pretty nice.
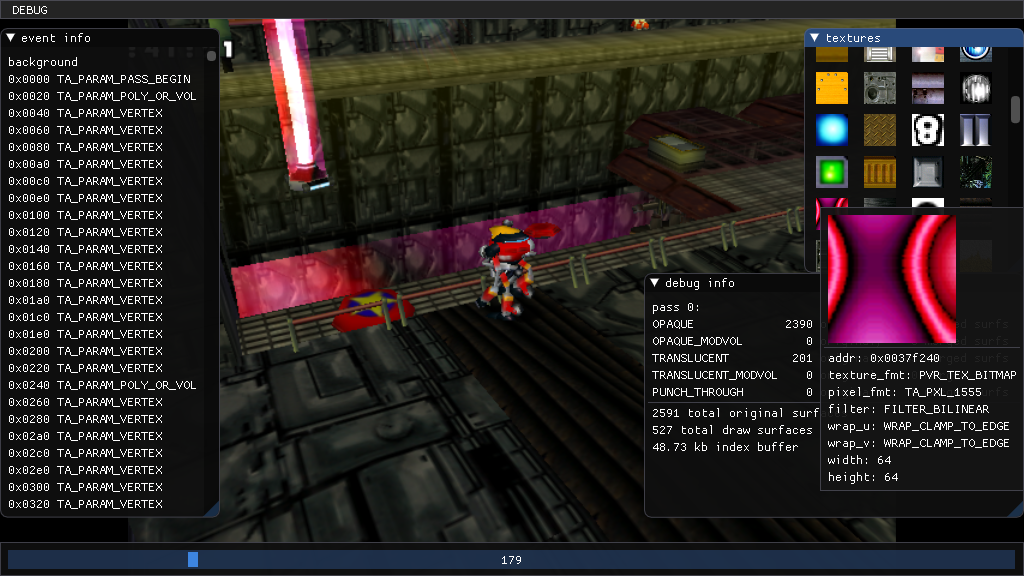
Some time later I came across redream, a Dreamcast emulator that was new at the time. Earlier versions of redream helped me understand a lot about SA1’s sound queue system thanks to various features of its debugger. It also had an extremely useful feature that let you trace the state of the GPU and dump all textures across a certain time period, which was where I finally saw the “real” texture for the plasma effect:
The texture’s pixel format is ARGB1555, which leaves out texture palette manipulation. Although still puzzled, I was able to produce a more faithful animation for Dreamcast Conversion. This animation was used in the mod all these years until yesterday. With it, I was able to make the effect look exactly the same as in the original game (thanks LastBreath for helping me arrange the textures and put them in a PVM).
Although it was good enough for the mod, I was still wondering how the original effect worked, and started asking around. The first useful hint was given by MetalliC, the developer of the Demul Dreamcast emulator. He said the effect looked like the classic plasma effect that was featured prominently in the demo scene a while back.
Now I knew the texture was generated using some clever trigonometry tricks, and that there were open-source examples I could try to recreate it. I was also curious about the actual implementation in the game: does it modify texture data directly? Is it pre-generated or real time? At least I knew what I was looking for, and with some things I learned since my last attempt, I decided to try to decompile it.
Starting with the texture list used by the objects in question, I was able to trace it back to the task that manages the effect, and decompiled almost the whole thing. Two functions that did the most important stuff were a bit out of my reach, but Exant did them for me, even matching them with the original SH4 disassembly.
I was expecting to see a lot of njSin’s or njCos’s but it turned out the effect uses precalculated values for the most part, and shuffles them a little. Before the effect starts, the following function runs once to fill out an array of precalculated sine values:
void AnimSet() // 0c91126c, decompiled properly by Exant
{
	int ang = 0;
	for (int i = 0; i < 256; i++)
	{
		animAngles[i] = (njSin(ang) + 1) * 32.0f;
		ang += 256;
	}
}
The function that executes the effect uses six arrays of hardcoded data to fill in texture data directly:
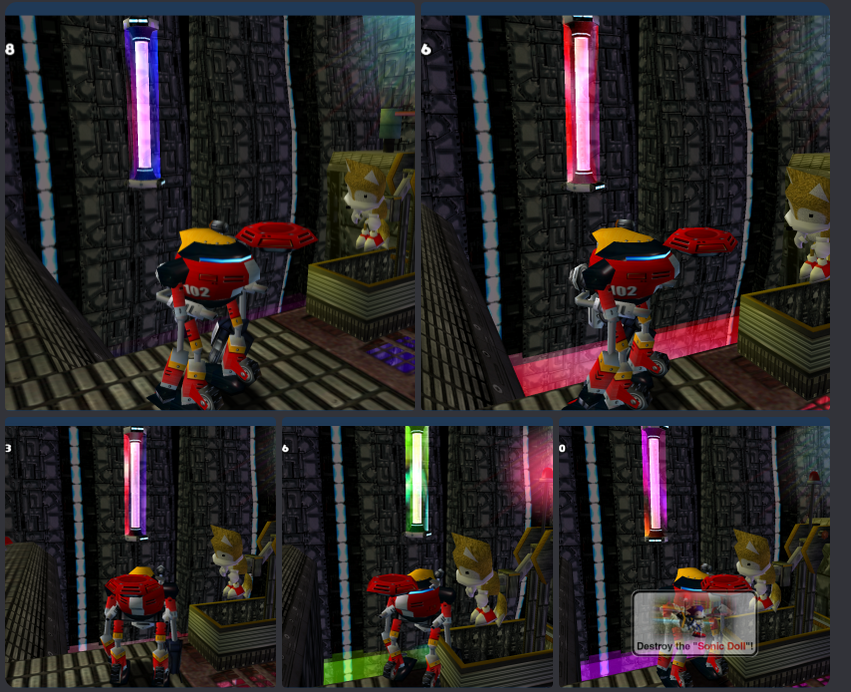
Why six arrays? The task’s Y Scale value is used to pick which array to use the data from. At first I thought the Y Scale value changes at some point, but it actually always stays at 0, so the other five arrays are never used. Was this effect supposed to change depending on where the player was, or depending on what object it was? We don’t know, but at the very least there are five variations of the effect in addition to the used one. You can check out the variations in the US 1.005 version of the game by setting the float at 0C81F8D0 (2C81F8D0 in Demul) to 1.0, 2.0, 3.0, 4.0 or 5.0 while the stage is loaded. Interestingly 0 and 2 look the same even though the data for them isn’t identical, while the other variations stand out with different colors:
Value
Effect
0 (default)
1
2
3
4
5
The original game keeps track of the number of traps and cylinders loaded, and stops the effect if there are no objects using it. As such, there is only one texture being generated, which is reused for all objects. However, nothing is stopping us from generating all six of them in Dreamcast Conversion! In the update to the mod released today, you can select the variation of the effect to use in the mod’s configuration, including a “random” option that will assign a random variation to each new object. Check it out!
As for why this effect was replaced in SADX, I don’t have a definite answer. Since it uses a lot of precalculated data, there is no technical reason it couldn’t have been done in the Gamecube or PC versions exactly the same way as in the original. Perhaps it was a stylistic choice?
Curiously enough, the SADX replacement uses six textures, matching the total number of data arrays in the SA1 version of the effect. To implement all of the variations I also had to expand the texture list to 6 entries. Perhaps it’s simply a coincidence.
This concludes another SA1 mystery that’s bugged me for over 8 years. It’s amazing that after all these years of research we still find unused things in the game.
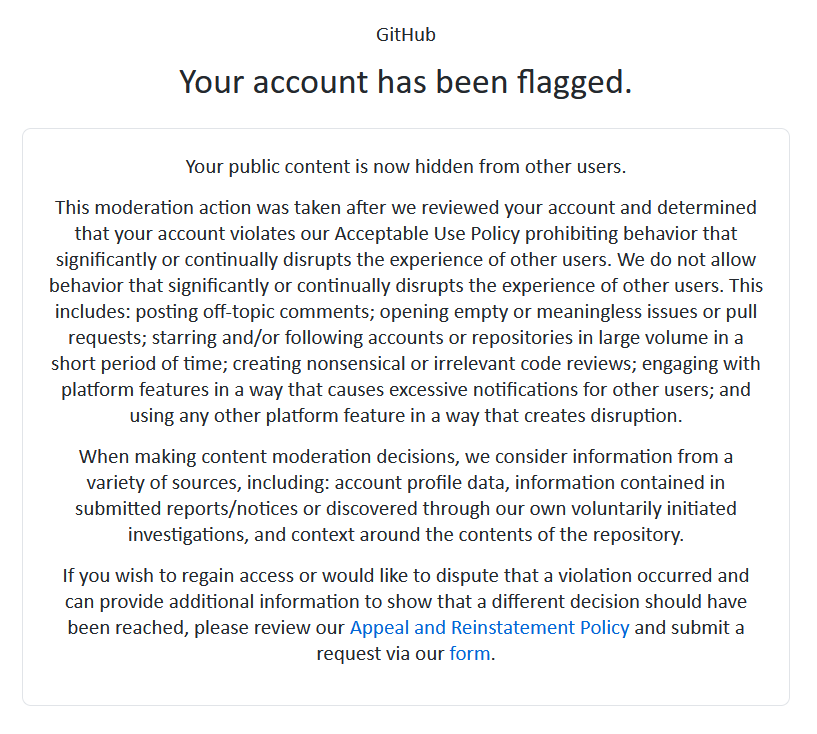
I knew this was going to happen sooner or later, though the timing was a bit unexpected.
In practical terms, this means the following:
Updates for SADX Mod Manager Classic (the one maintained by me) will no longer work.
Players updating from older versions of SADX Time of Day and SADX Style Water mods will no longer be able to update.
All issues and comments I’ve ever posted on SA Tools, SADX Mod Loader etc. are no longer visible.
Well, what can I say? Fuck Microsoft. I moved the majority of my repos from GitHub back in 2023 because I saw where it was heading anyway, and the classic Manager repo was there because it was convenient to use with AppVeyor integration. I might figure out a different solution someday.
At least it seems that the wikis I’ve contributed to are fine, and I can still push to repos on the x-hax organization. Losing issues and comments is really unfortunate though.
If you’re into SADX modding, you’ve probably seen this video by NVIDIA showcasing modded SADX, the announcement of a “$50,000 RTX Remix Mod Contest”, and probably some of the drama that ensued.
At first, I was really happy to see SADX featured, it’s even right at the start of the video! Unfortunately, with regard to Sonic Adventure/DX, the video does a great deal of misrepresentation, a lot of work showcased in the video is uncredited, and the intentions of the people behind the RTX mods/hacks for SADX are questionable to say the least.
Which game is actually used in the video?
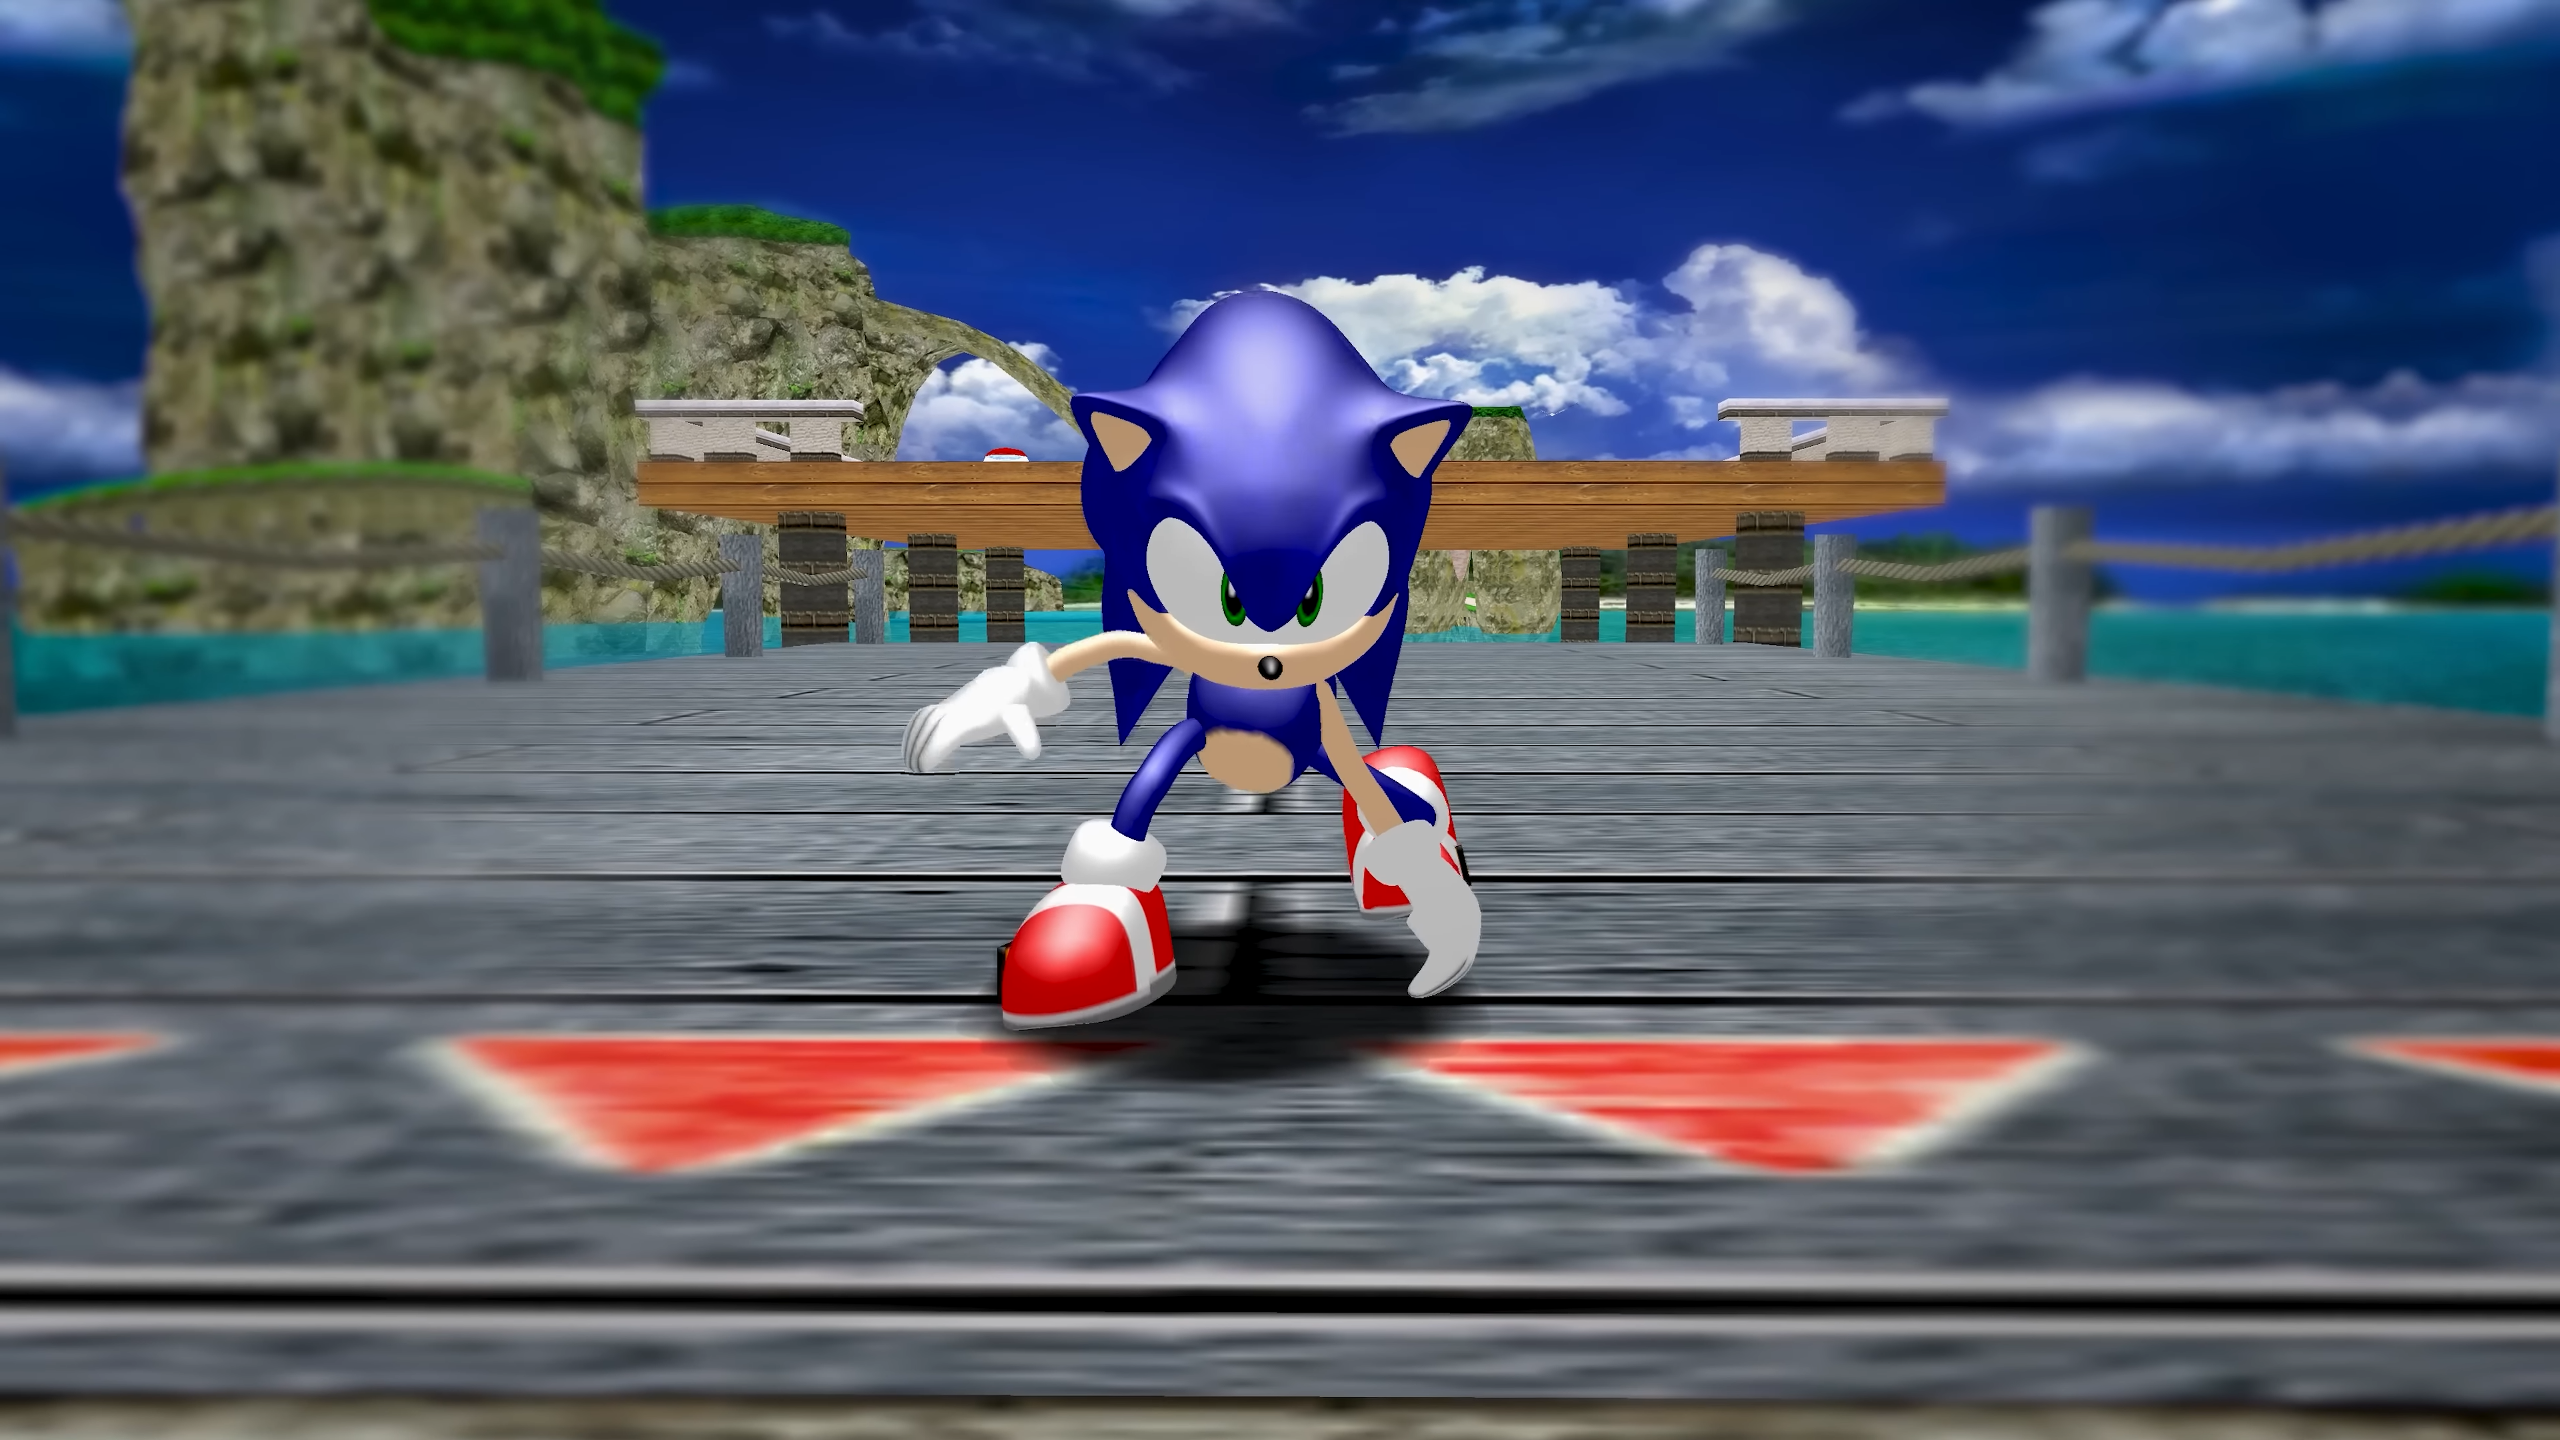
Let’s start with the video itself. Here’s a still frame from the beginning of the video. What does this look like?
If you’re aware of the differences between Sonic Adventure ports, you can easily recognize this is SADX PC with the Mod Loader. Even if you aren’t familiar with the differences between Dreamcast and DX Emerald Coast, the dead giveaway is Sonic’s pose, which he doesn’t use normally. It appears to be Sonic’s “skidding on slope” animation (or an edit of it), which can be seen in the Autodemo prototype, where Sonic’s Light Speed Attack worked differently. To get Sonic to display this animation, his action ID needs to be changed in the player data structure. This can be accomplished with Cheat Engine if you are familiar with the game’s internals and know the exact address, but the most likely way they did it was by using the “Event Animation Editor” feature of Speeps’ Meme Maker mod. The camera zoom-in could’ve been done manually or with Meme Maker’s Camera Editor. Among other mods it is obvious that the video used Dreamcast Conversion (but without Lantern Engine) and some kind of Sonic model mod based on the SA1 Dreamcast Sonic model (previously Kaori claimed it was their model, but later retracted the claim). None of the above are ever mentioned or credited in the video.
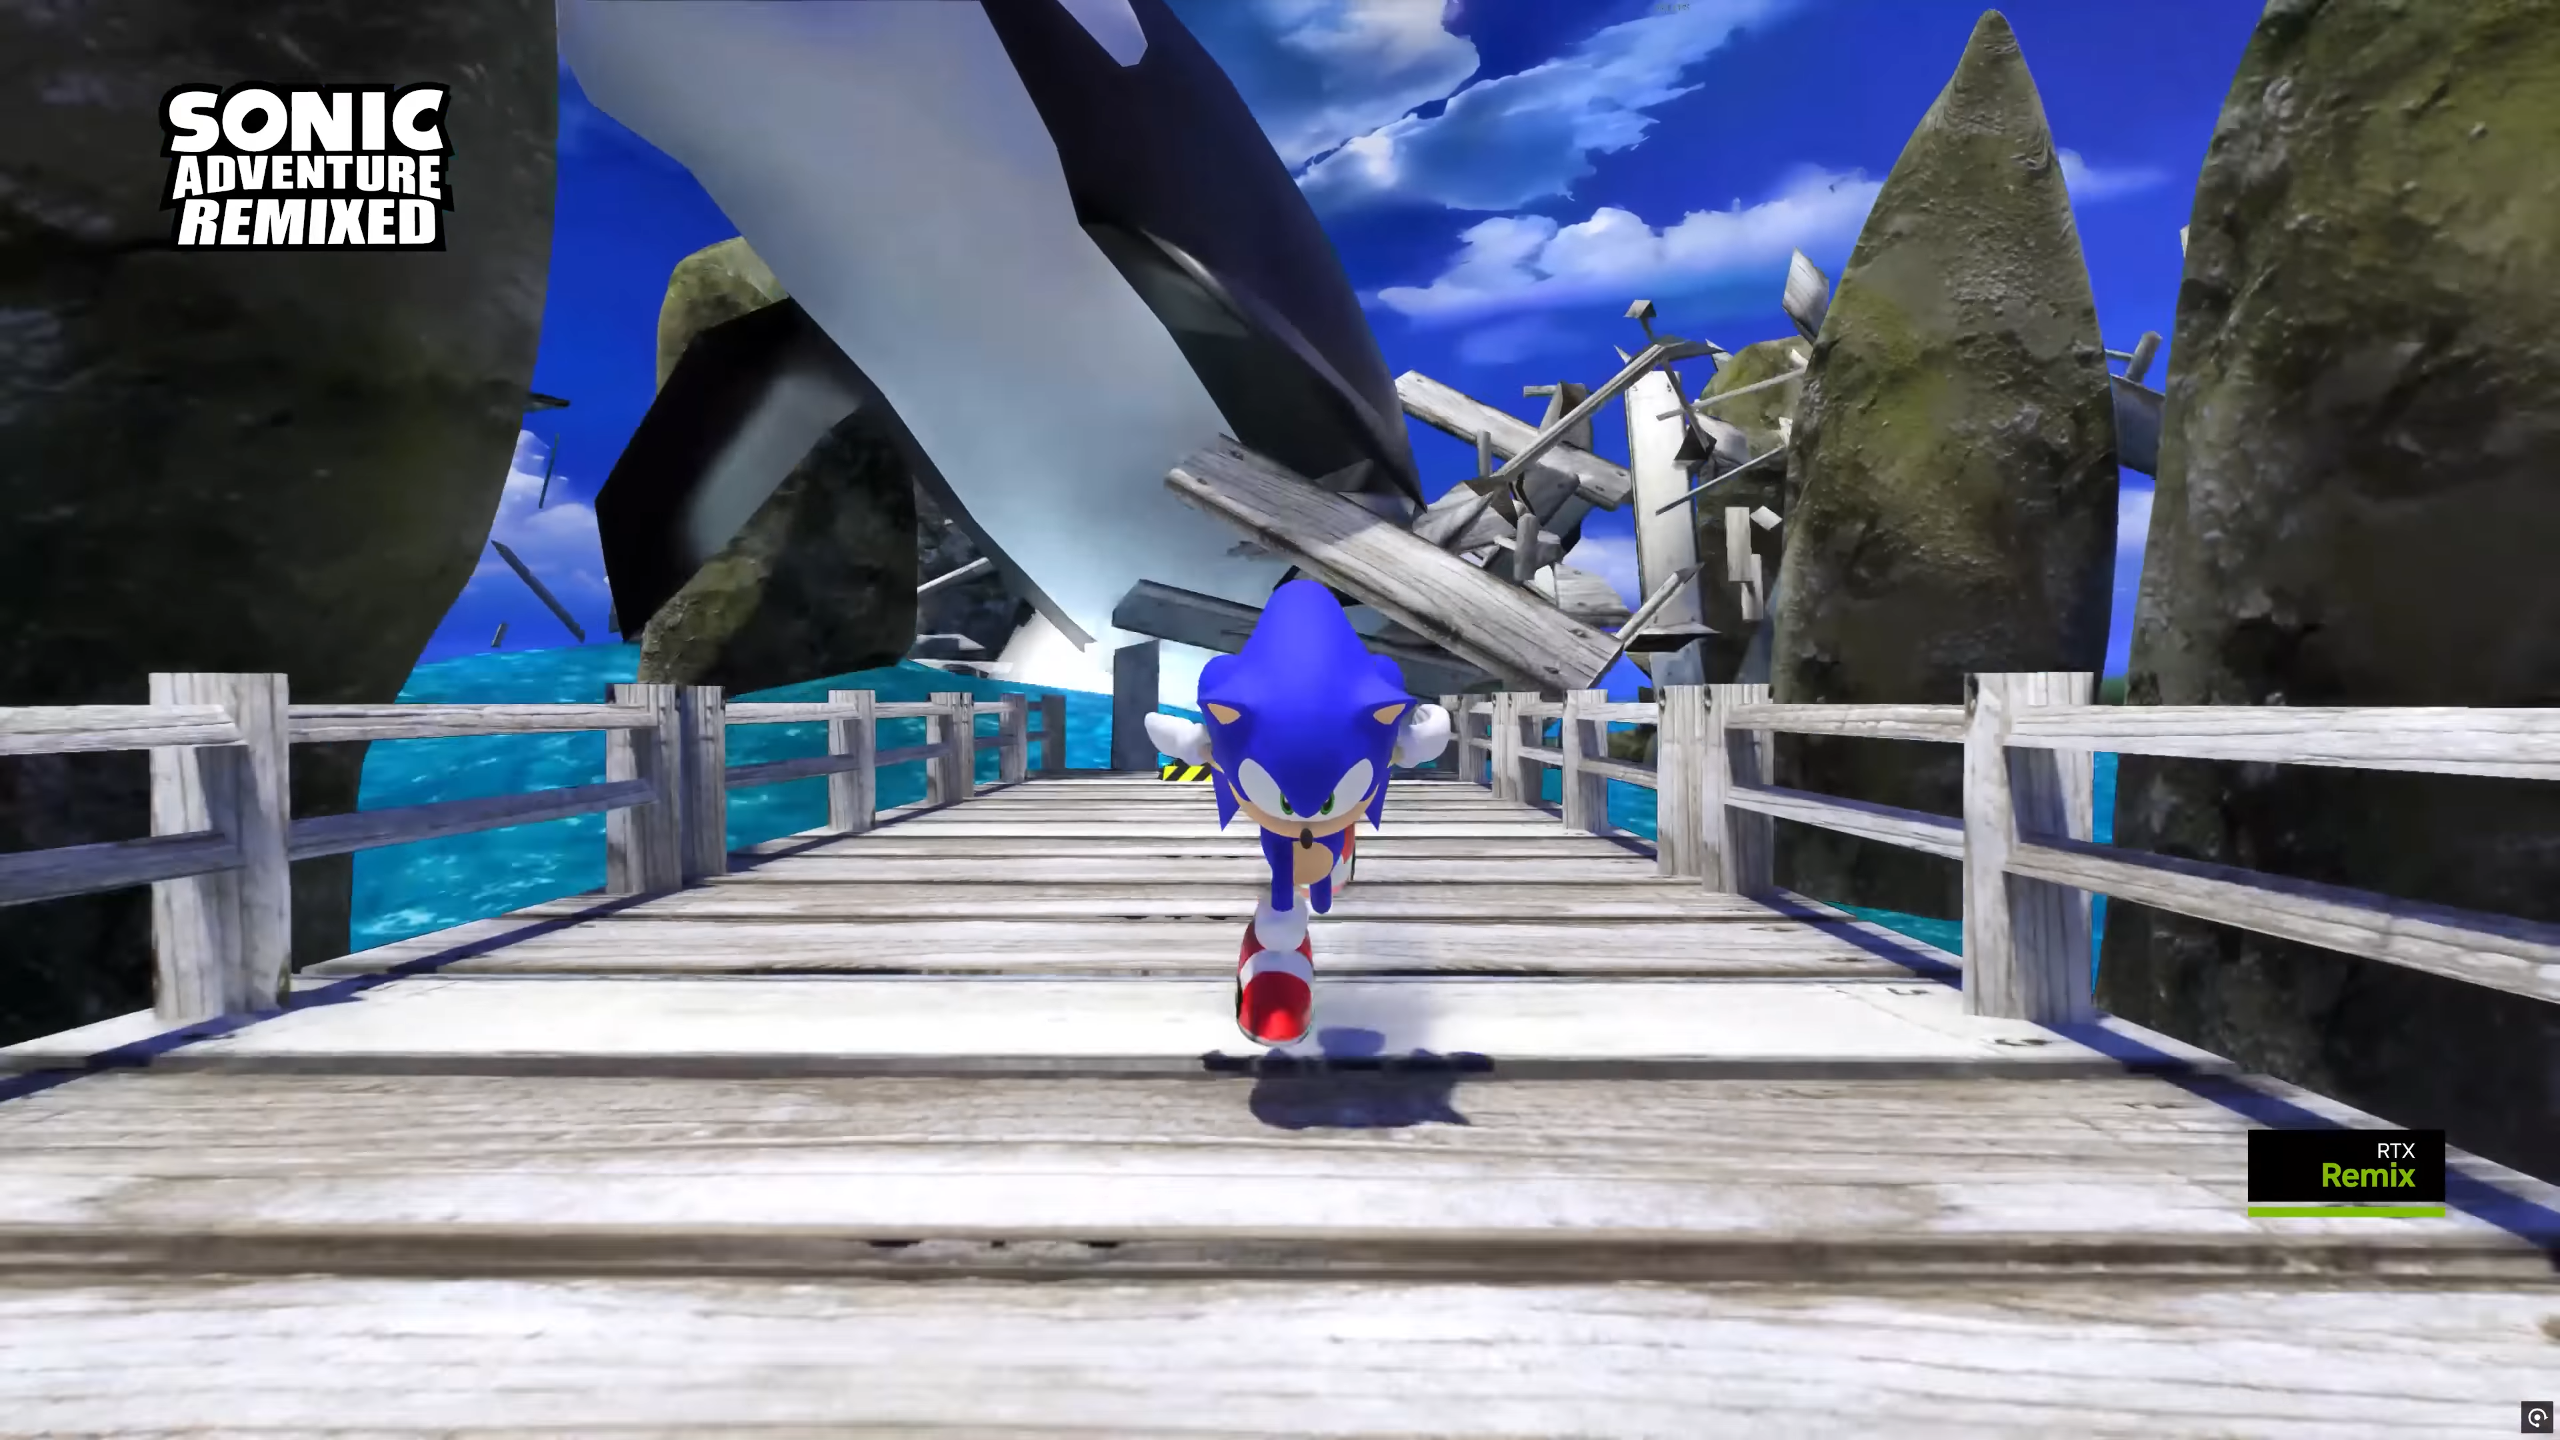
In the part of the video where “Sonic Adventure Remixed” is showcased, it is clear that Dreamcast Conversion is still being used because you can see the vertex distortion effect on the ocean waves from the Dreamcast version.
This effect was removed in SADX, and a slightly edited version of it is restored in the Dreamcast Conversion mod. I talk about this effect on the Dreamcastify blog.
What is “Original Game”?
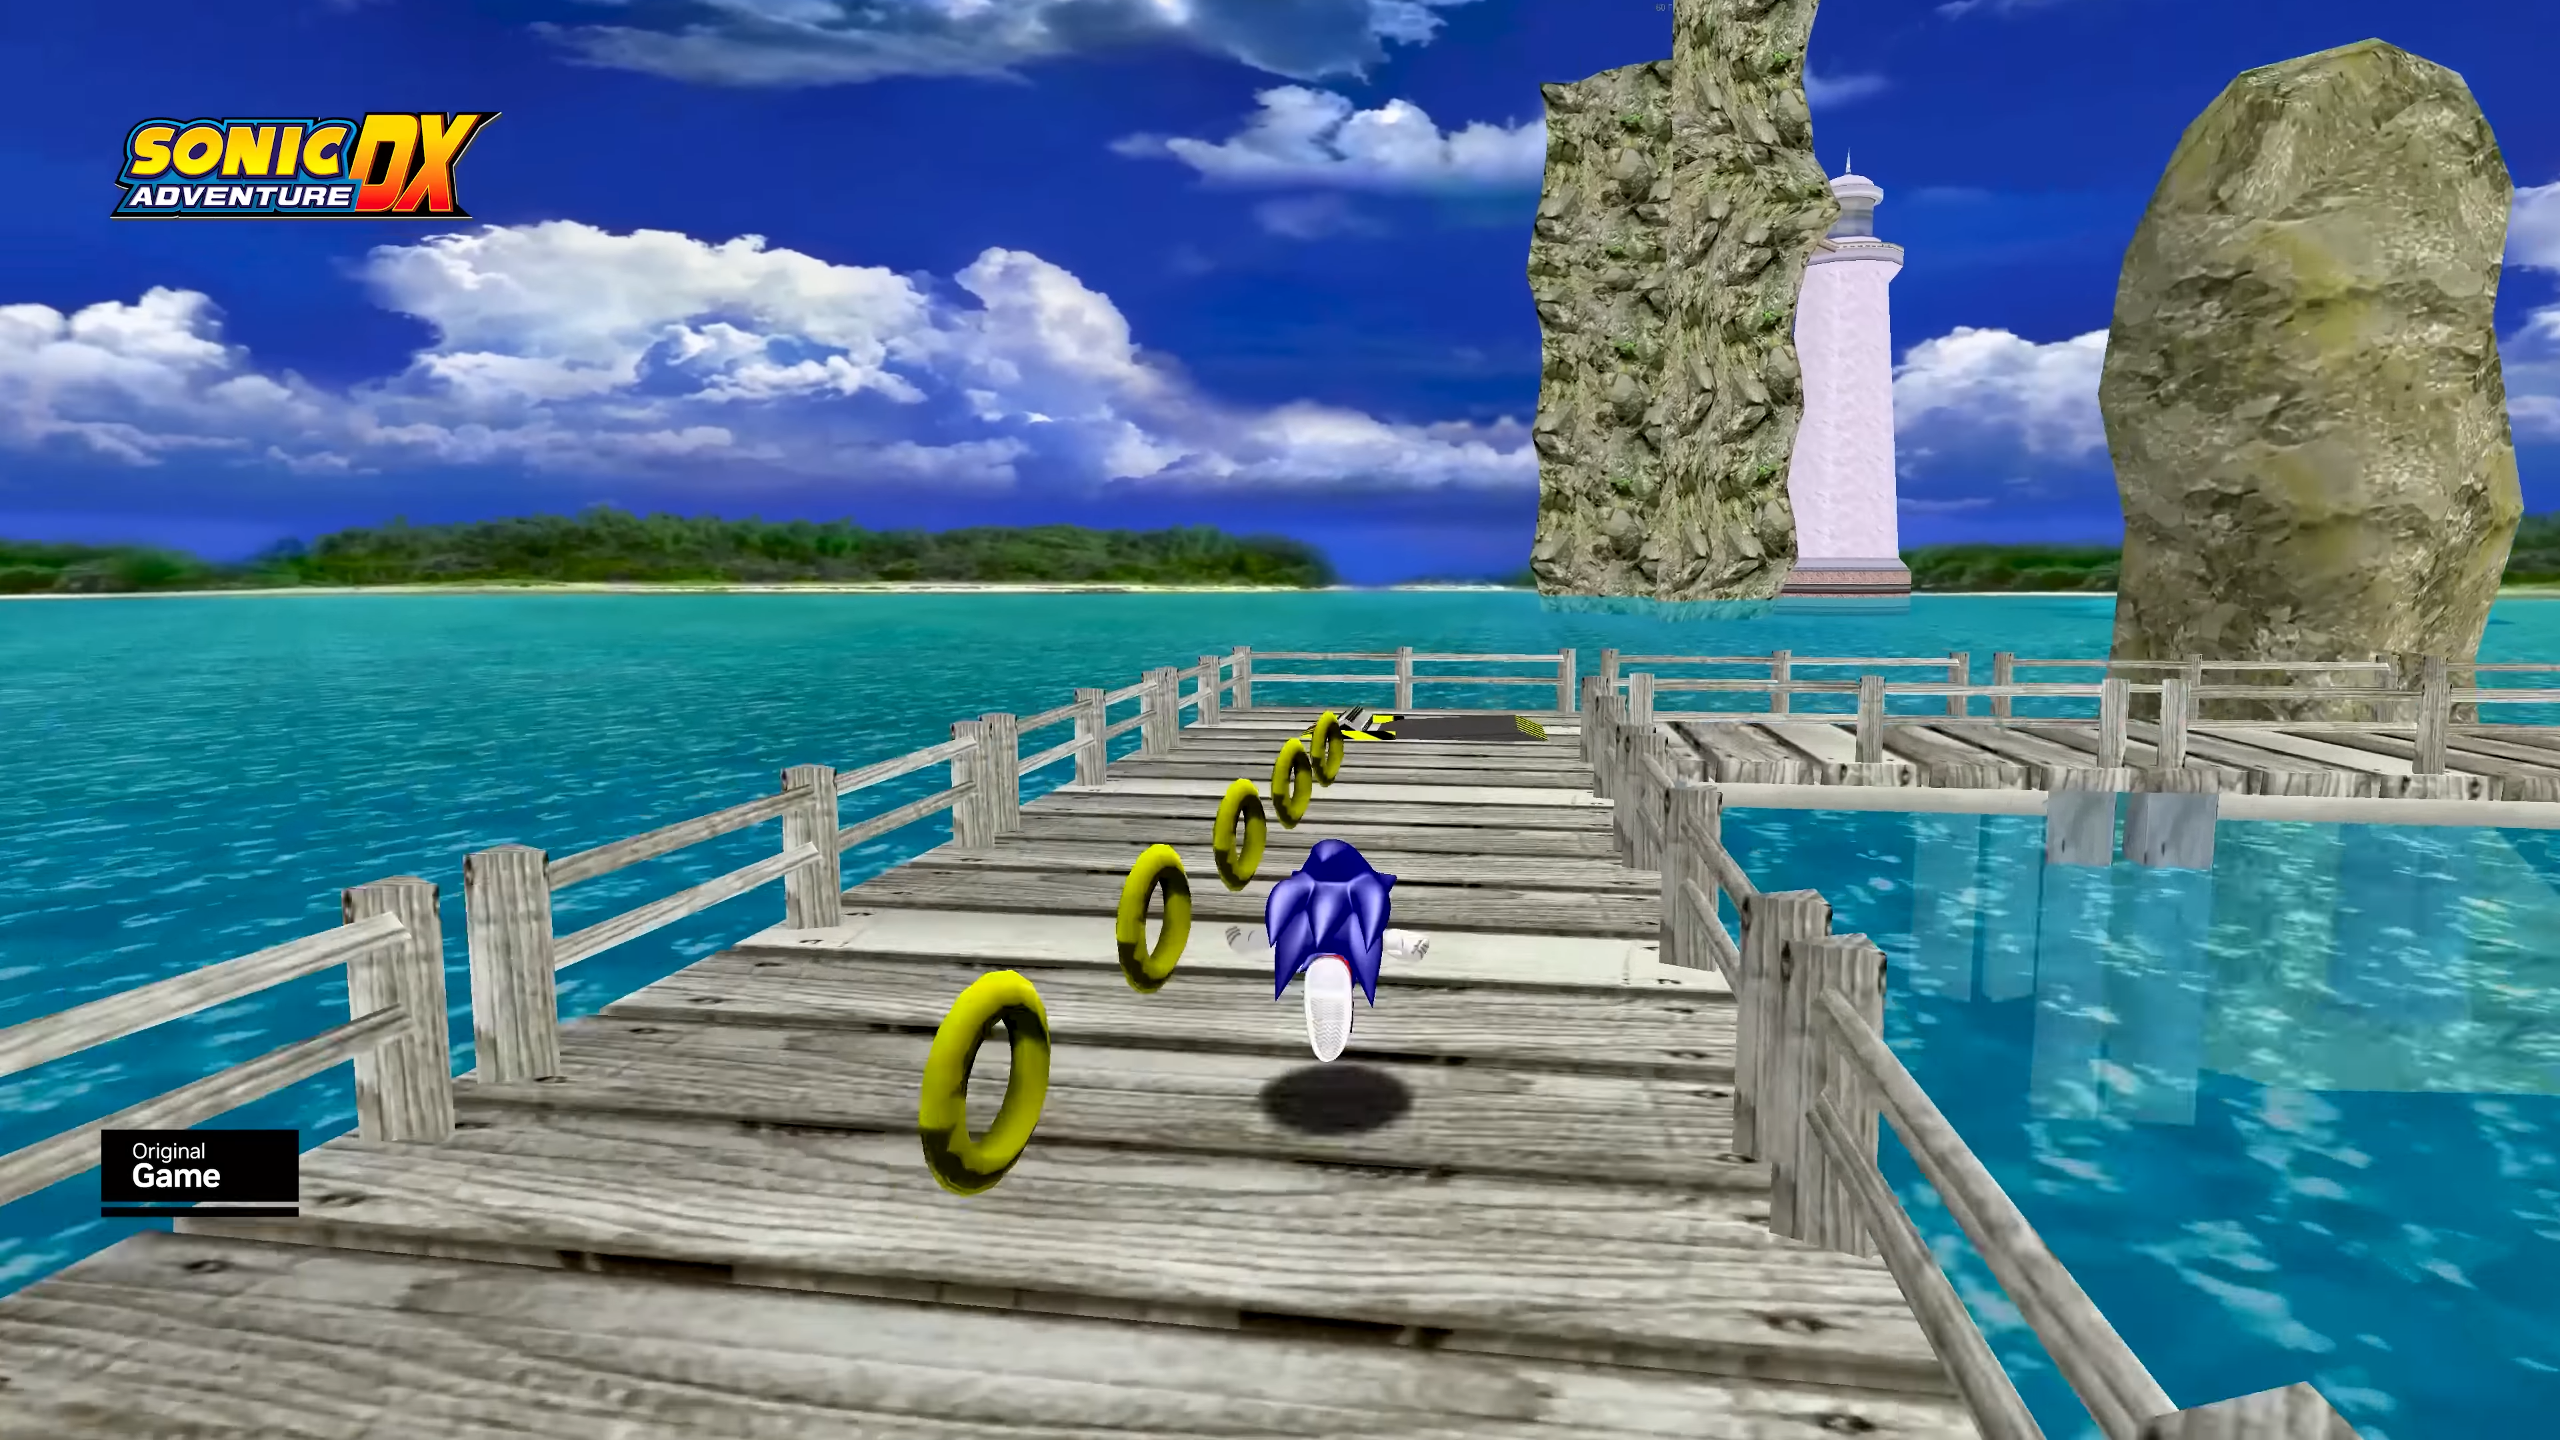
So, with the above we’ve established that the version of the game shown in the video is definitely using the Mod Loader and various mods. Next, let’s have a look at the snapshot below.
At the bottom left, it says “Original Game”, which is a gross misrepresentation. If they mean “Sonic Adventure DX” as the logo on the top left implies, there is no way this would qualify as the “original game”. To start with, not a single version of Sonic Adventure DX uses the Dreamcast version’s ocean textures in this level. So “Original Game” is actually the 2004 PC port of Sonic Adventure DX modded with the SADX Mod Loader and the Dreamcast Conversion mod (and likely some kind of texture upscale mod), at the very least.
Another thing I find particularly unfortunate is the way the lighting is misrepresented. It looks fullbright in the “Original Game” part of the video because the Lantern Engine mod was disabled. One of the major differences between Dreamcast and DX level models is that the DX models have baked-in vertex colors to compensate for the removal of Lantern Engine. The Dreamcast levels, on the other hand, do not have vertex color data. As a result, if you don’t use Lantern Engine, there will be no lighting on Dreamcast levels among other things. That’s one of the reasons this warning appears when you start the game with Dreamcast Conversion but without Lantern Engine:
Yes, I know they had to disable Lantern Engine because it’s not compatible with RTX Remix. That’s no excuse for failing to represent either version of the game, especially since they have graphical differences, which are the main point of comparison in the video! Whether or not that was intentionally misleading or just someone’s lack of competence, I don’t know. But if you want to know what “original game” looks like, here it is:
Just a reminder: this is the actual product that was released for PC as “Sonic Adventure DX” in 2004. Looks a bit different without the Mod Loader, doesn’t it? Many people don’t realize or just take for granted the work we did in the Mod Loader over the years to fix various issues in the game. The original port doesn’t even set the window size correctly on 16:9 screens in windowed mode, not to mention the low precision Z-Buffer and lack of mipmaps. The Steam version has some of these issues fixed (adding a whole bunch of its own), but it isn’t compatible with the Mod Loader and, since it doesn’t use a fixed pipeline renderer, it isn’t compatible with RTX Remix in the first place.
To sum up, I think it’s an unfair comparison. Part of me wants to believe the video was made in good faith, so here’s how I think this part could’ve been done better:
They could’ve compared against the original Dreamcast, Gamecube, PC (2004 or Steam) version of the game without hacks or mods, with clear indication of what version of the game is used.
If they had to use the modded 2004 PC port, they could’ve disabled Dreamcast Conversion for a more accurate representation of the 2004 PC port.
If they had to have Dreamcast Conversion enabled, they should’ve recorded the “Original Game” part with Lantern Engine. Of course, even with that the “Original Game” bit is questionable, but at least they wouldn’t be mixing Dreamcast levels with SADX PC lighting, so it would be closer to the Dreamcast version, which is the “original game” after all.
Instead of “Original Game”, it should’ve said “RTX Off”, which is probably what they meant to say anyway.
The developers of the Mod Loader and all the mods that appear in this video should’ve been consulted with beforehand, and a list of used mods and tools should’ve been included in the video or in its description, ideally with proper credits.
The last point in particular is really unfortunate because the developers of the RTX mods are credited at the end of the video, but nobody else is. Which brings me to the next thing I want to discuss.
Is it okay for a corporation to use uncredited fan work to promote their product?
Let’s look at some simple facts:
NVIDIA uploaded a video showcasing various RTX Remix mod projects for different games, which include RTX mods for Sonic Adventure DX.
The Sonic Adventure DX part of the video showcases the “Sonic Adventure Remixed” project, which uses the Mod Loader and Dreamcast Conversion (and possibly other mods) as dependencies. In addition, the “Original Game” part of the video misrepresents the original game by using a modded version with the Mod Loader and a mismatched mod set.
The developers of the Mod Loader and mods, including Dreamcast Conversion, are not credited in the video, and there was zero communication from NVIDIA or the developers of “Sonic Adventure Remixed” with us regarding the use of our work in the video.
Overall, I think it’s really bad taste and a misrepresentation of both the game and our work.
Is it okay for “Sonic Adventure Remixed” to take part in NVIDIA’s contest?
I have seen some of the strangest tweets and comments on this matter, so let me clarify several points I thought were obvious:
I do not claim ownership of original SA1 Dreamcast assets. I also do not claim ownership of the ideas, bug fixes or concepts implemented by me in Dreamcast Conversion, the Mod Loader or any other SADX projects I’ve been involved in.
Needless to say, our work, including mine, involves Sega’s copyrighted assets and code, and it cannot be used in any commercial project in principle. From the legal point of view, we are at Sega’s mercy entirely, and it’s extremely generous of Sega to allow our projects to exist at all.
I do not have the legal right to prevent people from using my work.
At the same time, I feel like I have a reasonable moral right to request for my work not to be used in contests with monetary awards, or in promotion of other products.
I have seen people say things like, “funny how these modders who use Sega’s stuff without permission are so protective of their mods when the same thing happens to them”. In my case at least, I don’t mind if someone uses Dreamcast Conversion or the Mod Loader as a dependency. I have a problem when my work is used in another project where money is involved in any capacity.
Because of the Mod Loader’s accessibility, many people seem to think Sonic Adventure DX is easy to hack and mod. Perhaps Dreamcast Conversion is just copying some files to replace SADX models and textures with their Dreamcast counterparts from the Dreamcast version so it isn’t even worth crediting? For anyone who thinks so, I encourage you to have a look at the unmodded PC version of SADX and a GDROM rip of the Dreamcast version and see if you can figure it out. Years of research engineering and tool development by dedicated enthusiasts went into these mods and tools, and taking this all for granted is an insult to all the work that was done over these years.
For Dreamcast Conversion, you can get some ideas from the Dreamcastify blog, but there’s much more work behind the scenes. I’m tired of talking about this for so many years. If someone can make the PC version look like the Dreamcast original or better WITHOUT RELYING ON DREAMCAST CONVERSION – more power to them, and feel free to use the documentation on the Dreamcastify blog! In fact, I will be happy if someone makes a better alternative. For now, though…
Request to the developers of Sonic Adventure DX RTX mods (and anyone else with similar ideas)
If you intend to get involved in any commercial projects or participate in contests with monetary awards, please rebase your work to not use Dreamcast Conversion as a dependency. I would like to make it clear that I am not affiliated with NVIDIA or any of Sonic Adventure DX RTX projects. Dreamcast Conversion is a strictly non-commercial fan project, and its usage in the RTX Remix video was done without prior consent. I do not consent to entering any of my work in contests with monetary awards, as dependencies or otherwise.
It’s been an eventful couple of months, so there are several things I’d like to talk about today.
New version of the SA1 analog fix
You may have heard of the analog deadzone fix for SA2 DC by OnVar. I was looking at input code in SA1 and found many similarities, so I made a request to woofmute, who successfully ported OnVar’s fix to SA1. The fix is available for the US version (1.005) and the Autodemo. I’m not sure whether the issue is addressed completely or if the fix has any side effects, but it appears to work and it’s definitely better than my old hack, so I suggest you give it a try.
The fix injects custom code into 1ST_READ.BIN. The patched bytes for the US version are as follows. With some patience you could turn it into a very long CodeBreaker code…
;Input function hijack
411e2=0ce0f6f3f5f34c8925c708f235f2488908a10ce0

;Input Patch block 1
41284=20e0f6f304c708f2f5f3b28935f2b08920e0b6aff7ff

;Input Patch Orig code reposition
41406=f7ff20e0f4aef6f3

;float for block 1
4129c=000040c5
There are two ways to get the patch:
If you have the TOSEC GDI of SA1 US 1.005, you can apply an xdelta patch to track03.bin. It works the same way as the SA2 patch in the description of the video linked at the top of this post, so you can use the video for reference.
To apply this fix and more, you can use the new Dreamcast Image Builder that I will talk about in the next section. The Autodemo version of the fix is also available for Dreamcast Image Builder.
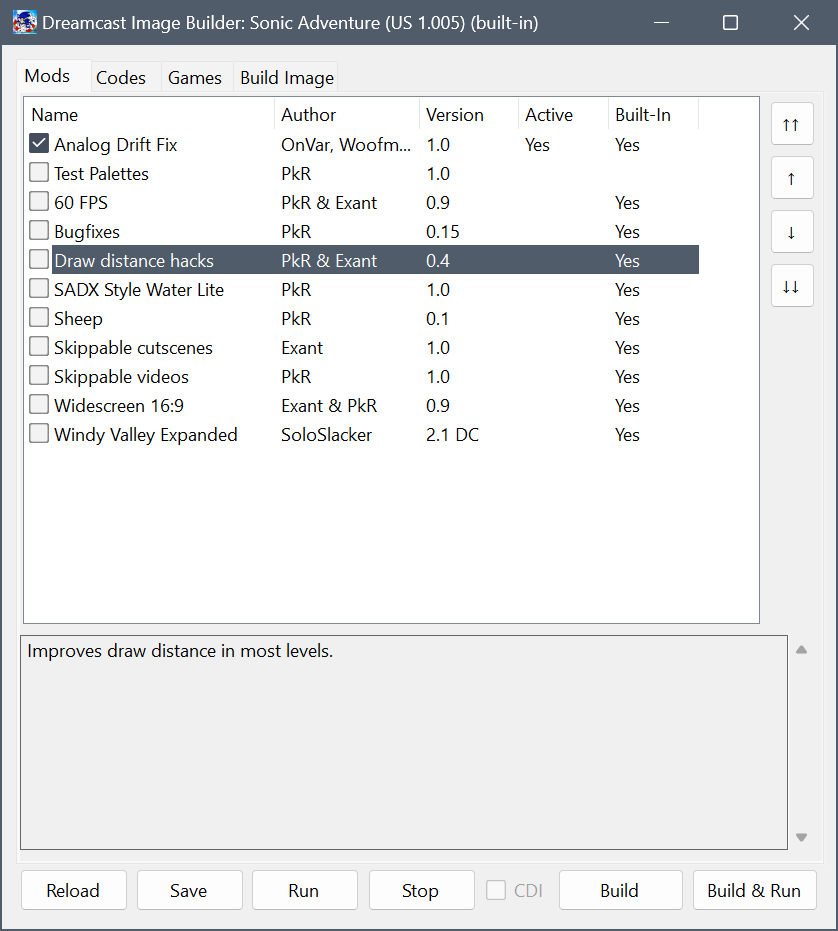
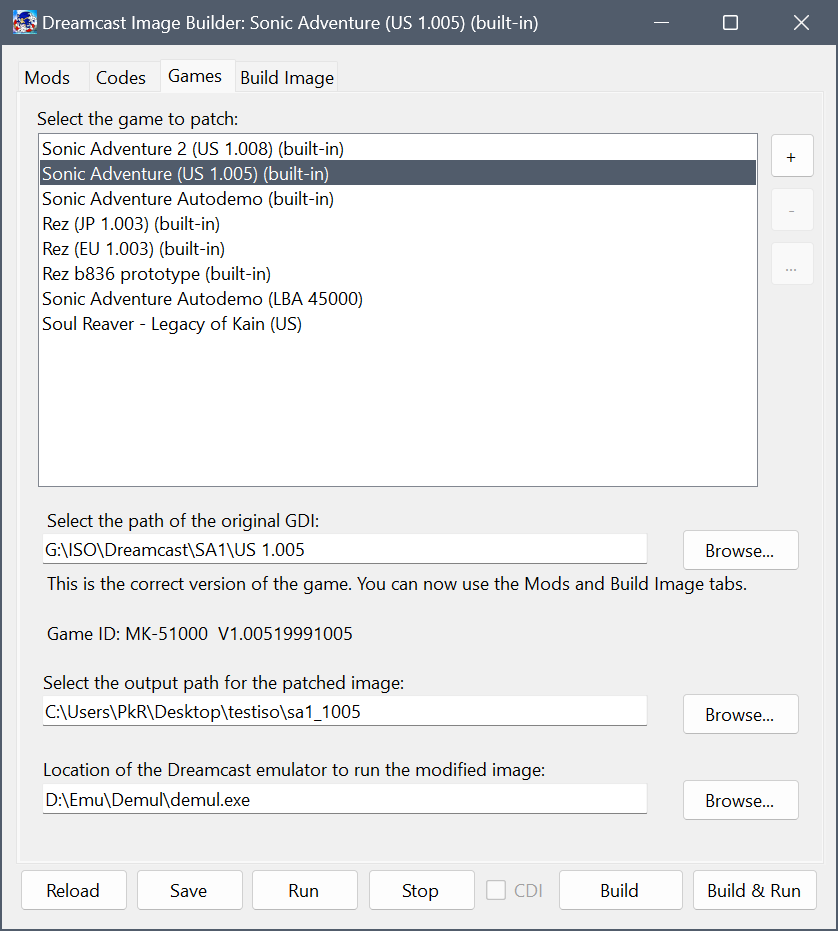
Release of Dreamcast Image Builder
This is an update to SA1-DC-HD, a project that originally started as a helper tool to add various enhancements to SA1 DC for playing on the flycast emulator. The project has grown to become a universal patcher for Dreamcast games.
As you can see, it’s heavily inspired by the SADX Mod Loader/Mod Manager and uses the same concept of “mods” to add hacks to games. Of course it’s a lot more limited than the actual Mod Loader, but you can do neat things with it. For example, to test its capabilities I made a mod that replaces Deer with Sheep from SA2:
(Chao body parts not implemented yet)
You can check it out here. All mods from SA1-DC-HD are built-in, so you can use it right away. The wiki explains how to use the tool and develop mods for it.
New Autodemo research
You may have seen new videos uploaded by Speeps and woofmute which demonstrate various debug features of the Autodemo and levels that didn’t work before, such as Casinopolis. This was made possible thanks to the research done by Speeps, woofmute and other members of x-hax, as well as previous research by evilhamwizard, ItsEasyActually, supercoolsonic and others.
As you may know, parts of the Autodemo come from different builds of the game that were at different stages of development. When the Autodemo was put together, only the levels that were meant to be shown in the demo were recompiled, and the other levels were left over from older builds (for most of these, textures and lighting files were also missing). We can tell which binaries were recompiled by looking at file dates on the Autodemo GD-ROM:
You can see that there are three “sets” of files sorted by last modified date. The files that don’t boot were compiled against an earlier version of the game’s main binary (1ST_READ.BIN), so the pointers to functions and data in the main binary are all invalid in these files. However, it’s possible to find the functions and data they were meant to point to by comparing the pointers to known functions and data between these files and the files that boot.
Earlier work on this, which demonstrated partially functional Windy Valley and Sky Deck, was posted by evilhamwizard on Sonic Retro. More recently this was picked up by Speeps, who started putting together a list of known broken pointers and their correct counterparts. As the pointer list grew, more levels became functional when known pointers were replaced. To facilitate mass pointer replacement and game testing, I added Autodemo support to my SA1-DC-HD project (now Dreamcast Image Builder). As we were experimenting with the Autodemo, I adjusted the image builder’s mods system to be more flexible and easier to use and converted (together with woofmute) Speeps’ modifications into mods for it. I also repurposed some of my previous work to find missing textures by matching the names in the Autodemo’s texture lists against textures in the final version, the E3 build, the Autodemo Windy Valley mod for the PC version (where missing textures were recreated by its developers) and Dreamcast SDKs (which surprisingly have some early SA1 textures).
As a result of this combined effort, we got the game to show stuff that was never seen before. For example, here’s a preview of the old version of Chao Race restored by Exant:
Or a very early version of the Mystic Ruins:
Or woofmute’s restoration of the debug object placement editor:
Or a super early version of Twinkle Circuit:
Of course, you also have Speeps’ near-complete restorations of Twinkle Park, Lost World and Sky Deck. The biggest restoration so far is the early Windy Valley, the holy grail of the Autodemo for many SA1 fans. It’s based on Speeps’ and evilhamwizard’s pointer fixes and uses textures from the 2018 PC mod by supercoolsonic & ItsEasyActually.
There’s a lot more stuff released and in progress. We now have a public repository with some Autodemo mods, which you can apply with Dreamcast Image Builder to get the restored functionality and content ingame.
Note: Not all of the mods work on hardware at the moment. flycast is recommended.
This is a quick note to let you know that I will no longer provide updates for the HD GUI mod. The repository has been archived. If you are interested in continuing the mod’s development, feel free to unarchive it and/or make a fork of it.
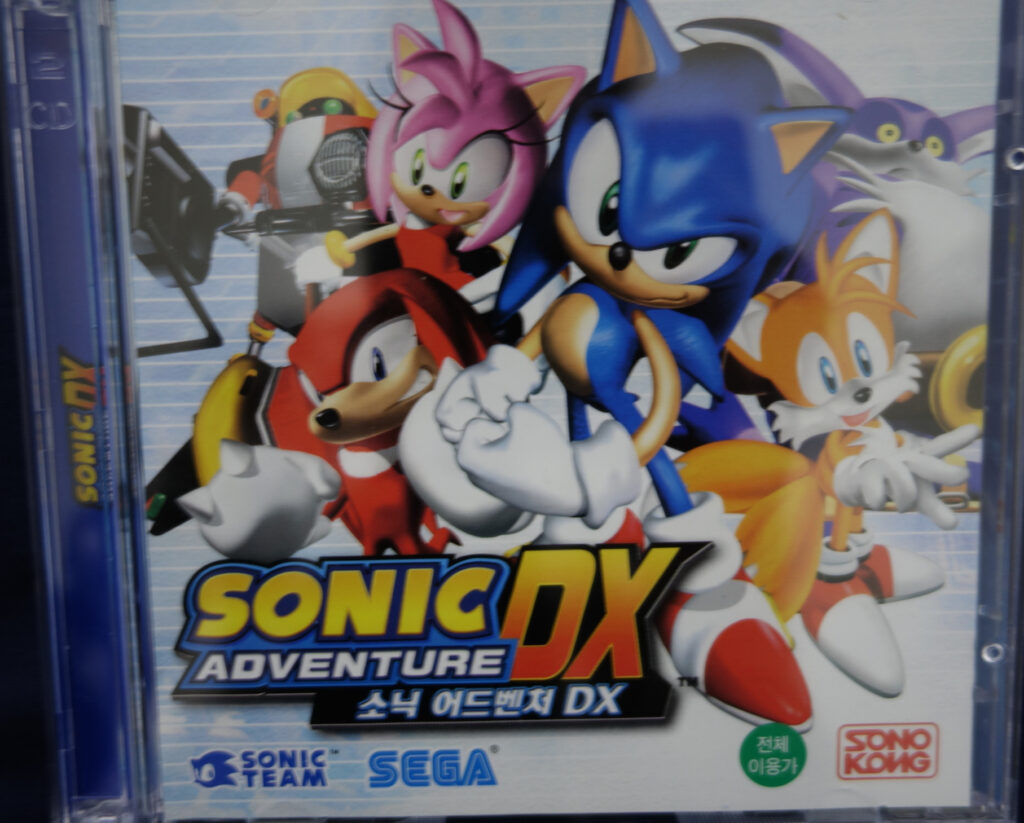
TLDR version: There was a Korean version of SADX PC released back in 2004. I ported the Korean translation to the Mod Loader, so you can now play SADX in Korean if you install this mod. The mod is compatible with Dreamcast Conversion and Dreamcast DLC but incompatible with HD GUI.
Four years ago I got my hands on a somewhat rare version of SADX PC. I was completely unaware of its existence until I accidentally ran into a listing on an auction, so I got it right away. I’ve mentioned it before in a previous post, and today’s mod release brings the occasion to finally talk about it again.
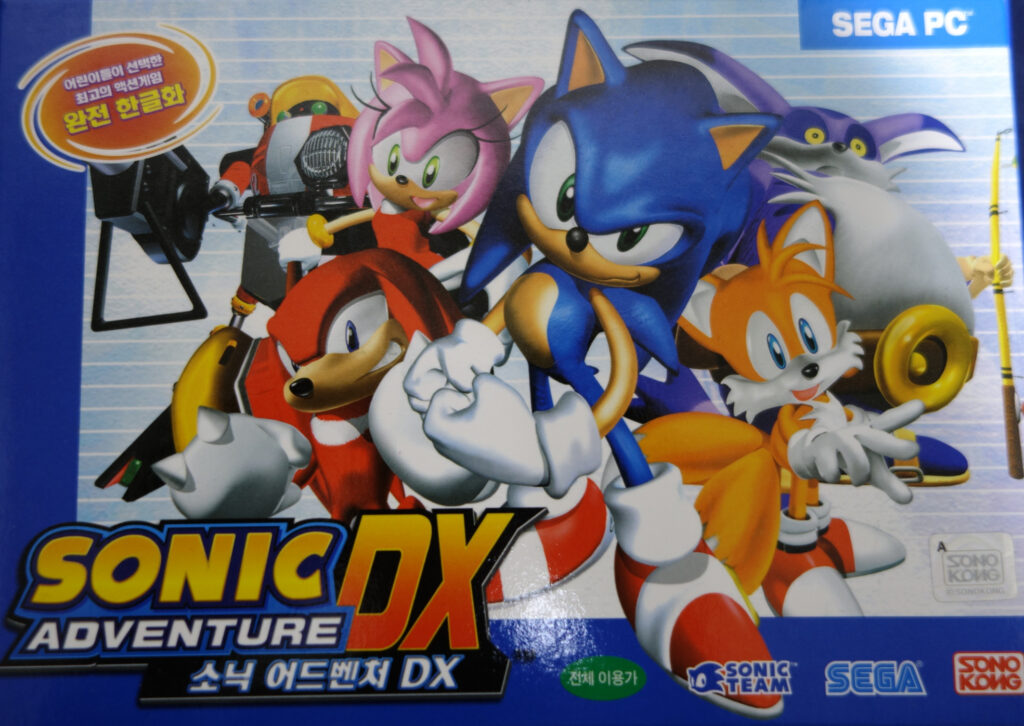
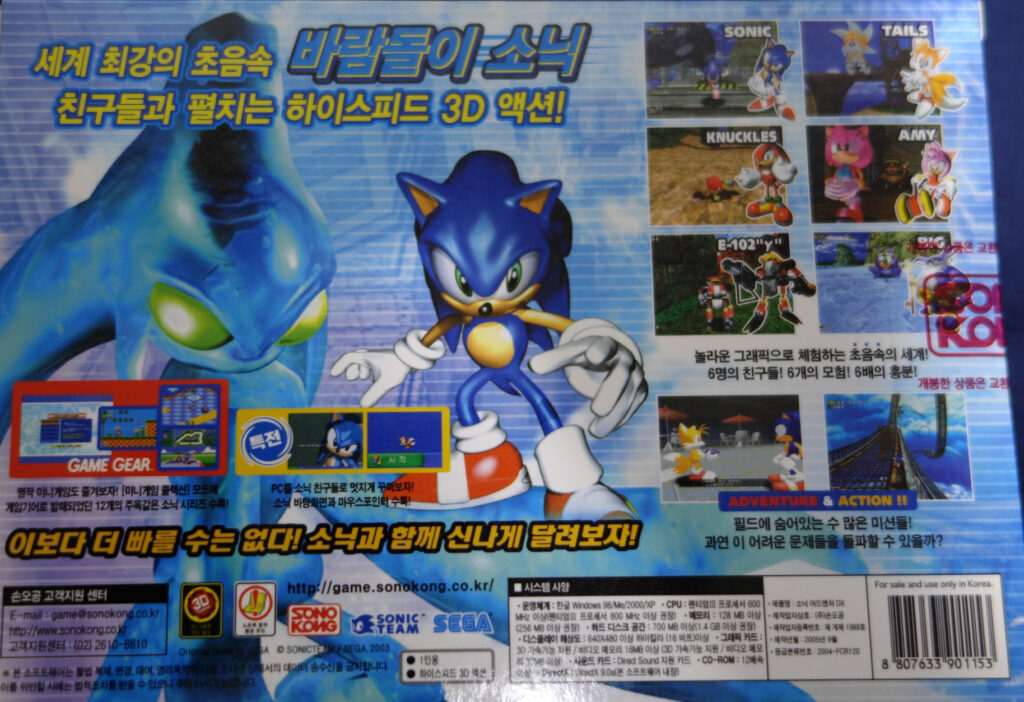
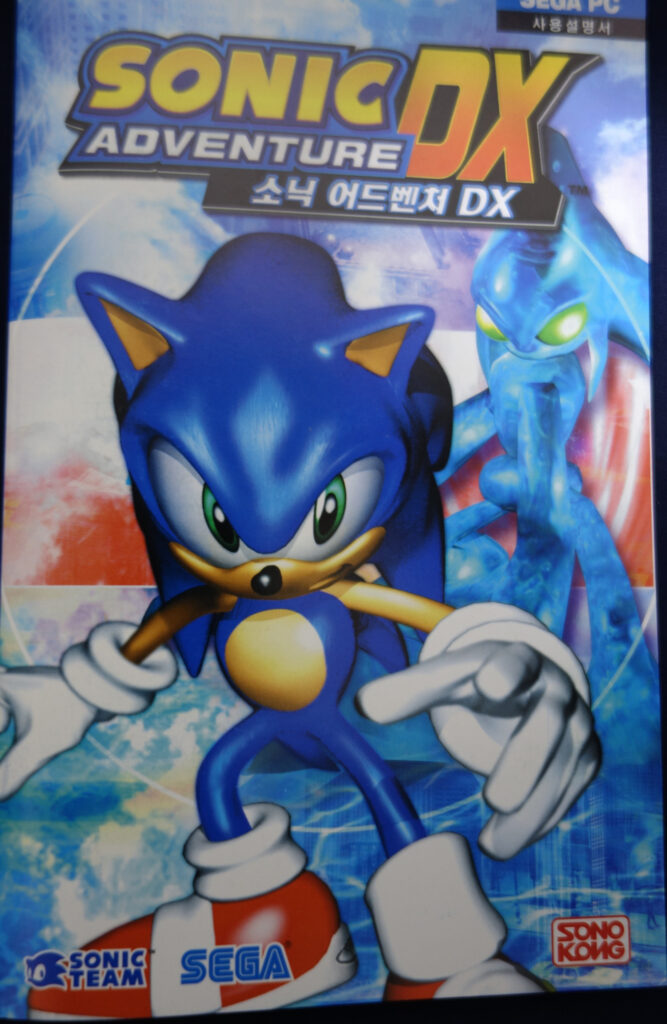
Introduction and game package
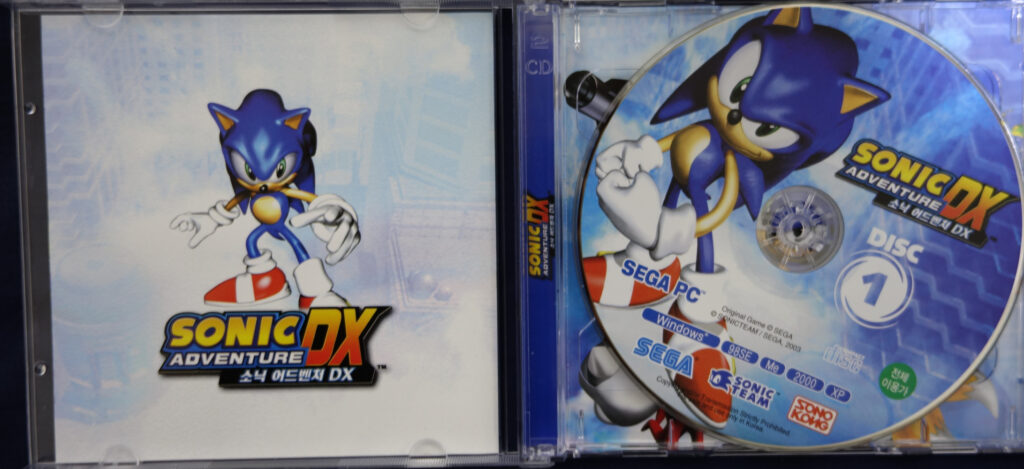
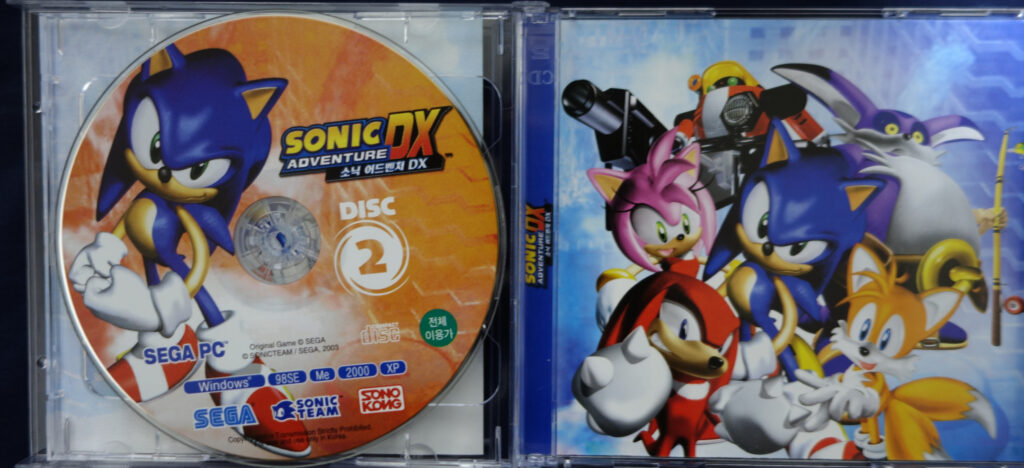
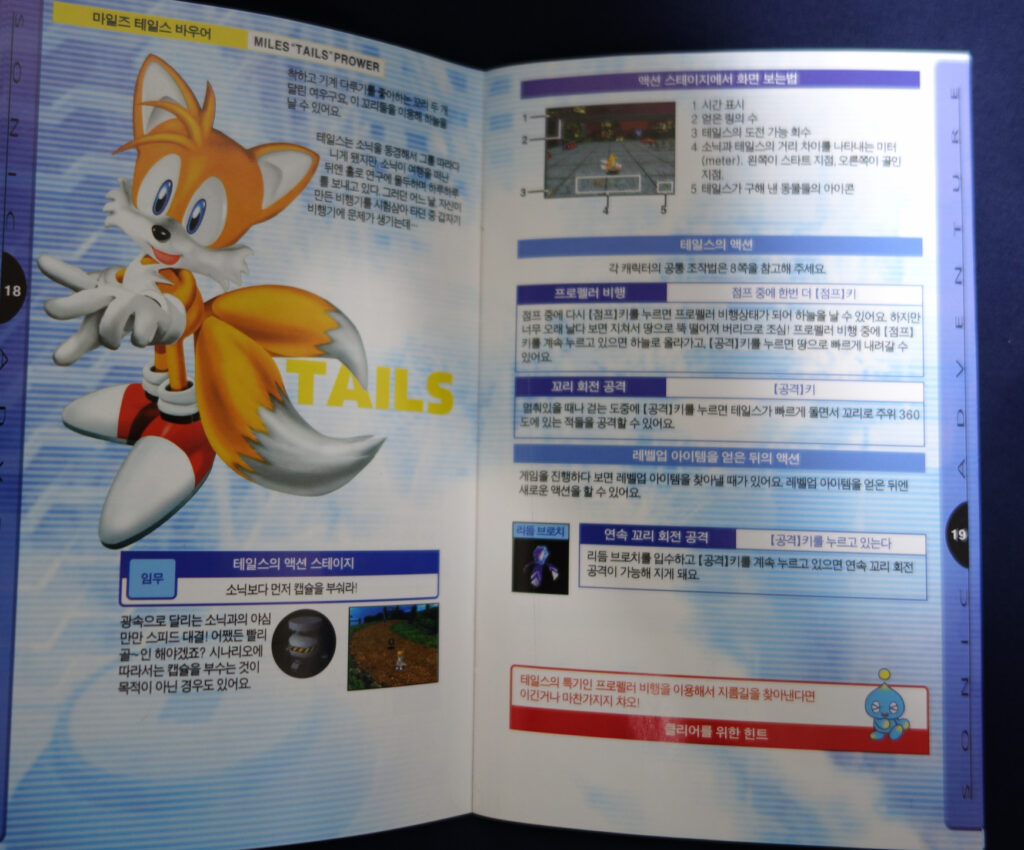
This version was released in July 2004 in Korea by a game and toy company called Sonokong. It’s a complete Korean translation of the game with English voices. The game comes in a box with a fully translated manual, which is also in color! It looks a lot better than black-and-white Japanese and US manuals I’ve seen until now. Here are some pictures of the box, the discs and the manual. Please excuse the poor picture quality, maybe someday I’ll get to scanning these properly.
Installation and initial testing
Just like the US version, the game comes on two CDs. The simple CD check is also the same, so you can install and run the game on Windows 10 and above, unlike the Japanese version which no longer works because of SafeDisc. With the Korean version, you can pass the CD check even with the US version’s CD 2.
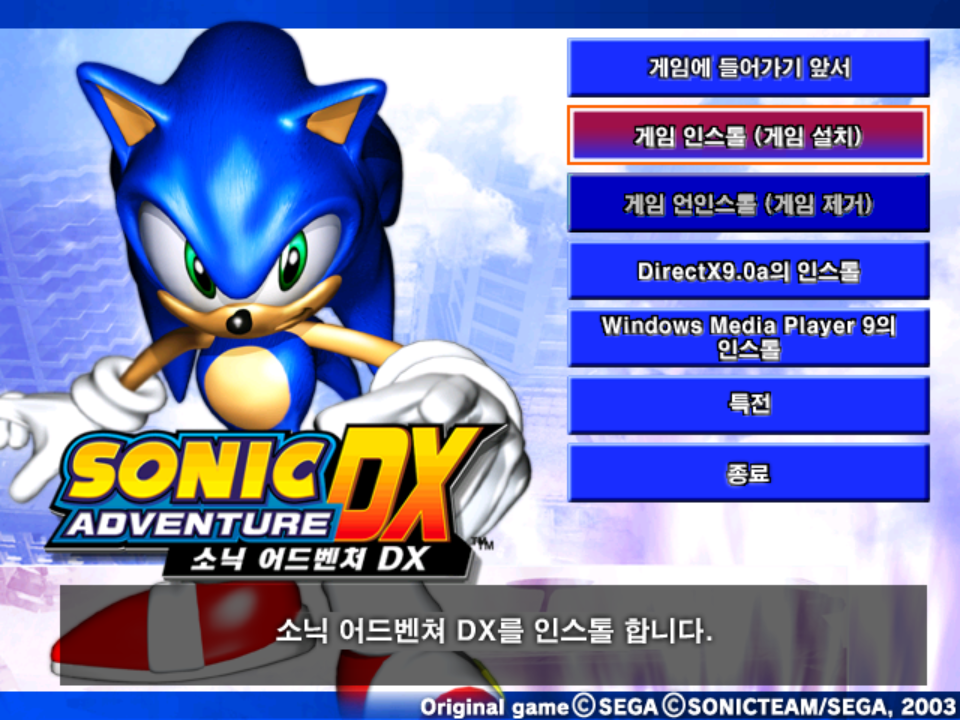
The autorun and the installer are also fully translated.
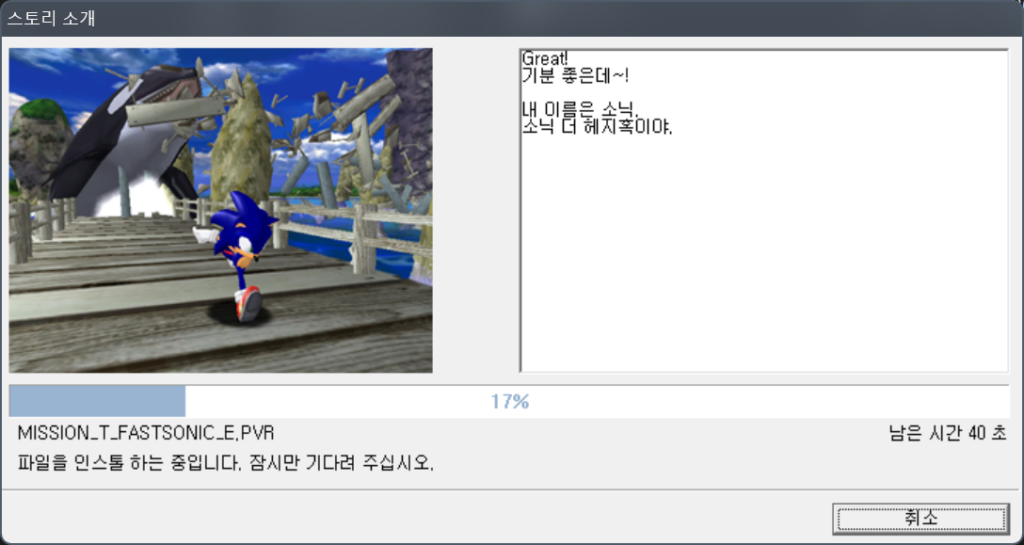
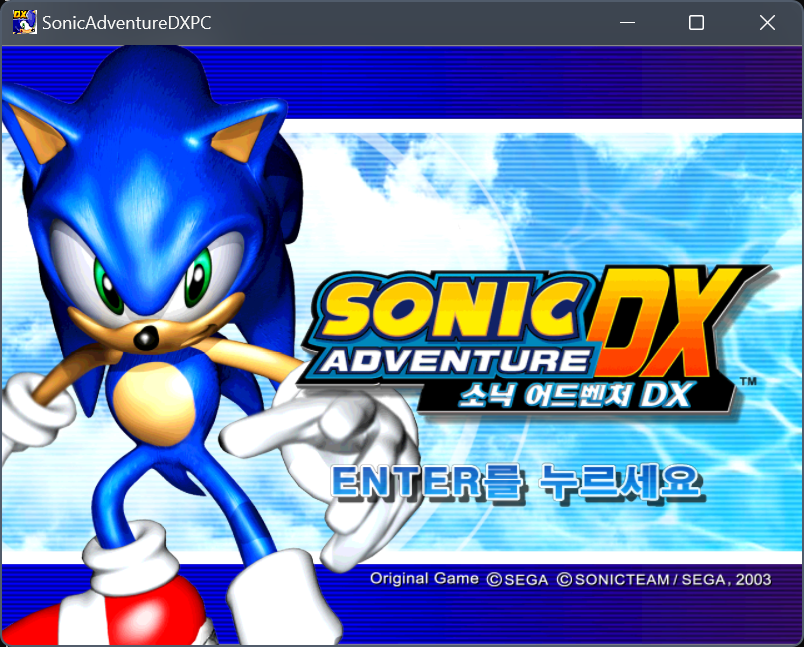
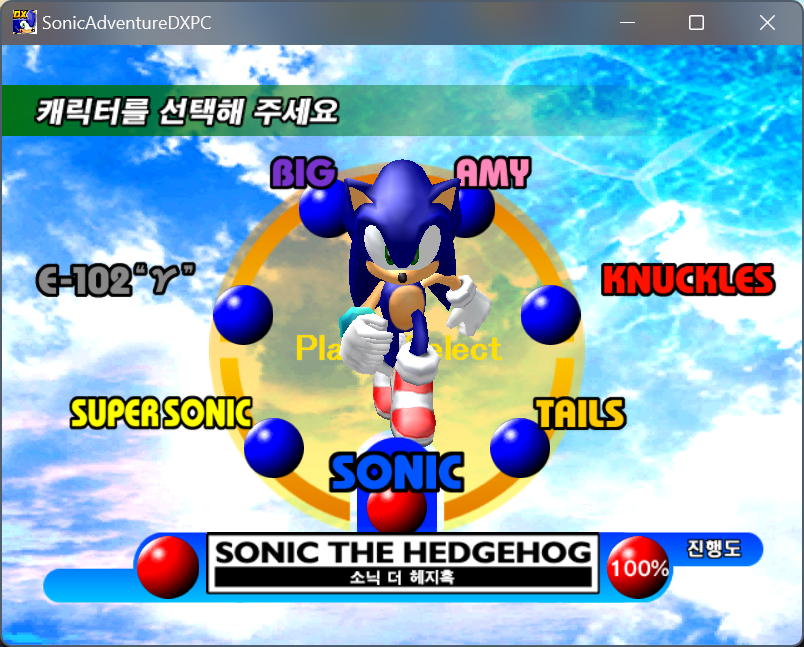
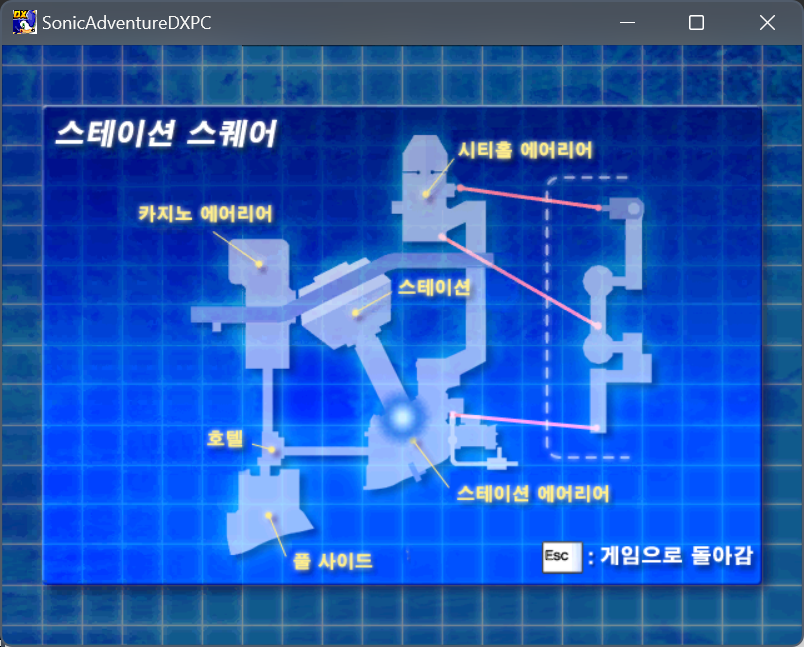
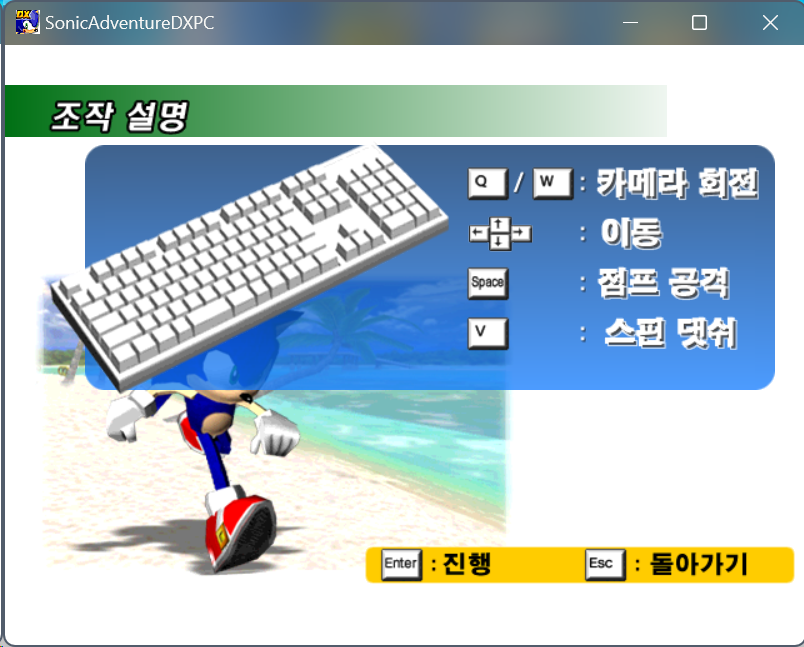
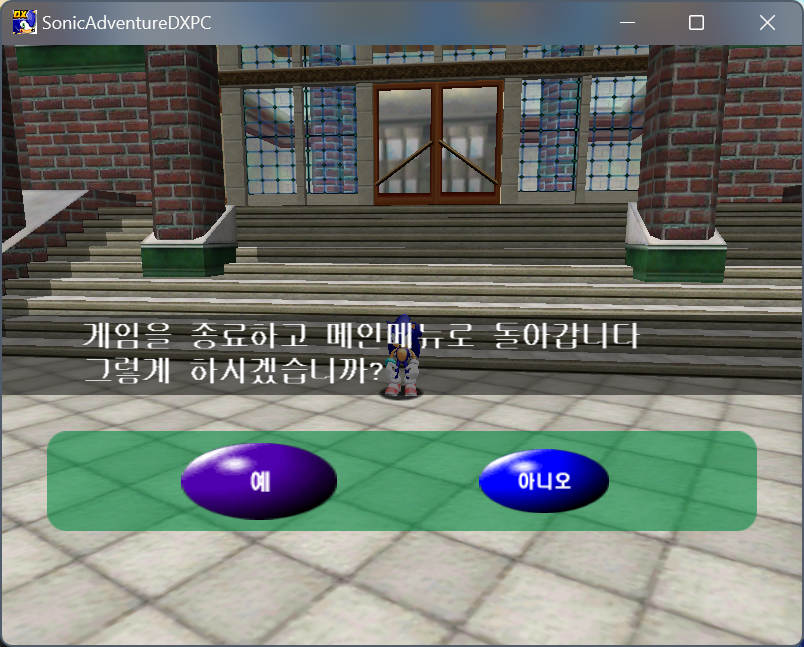
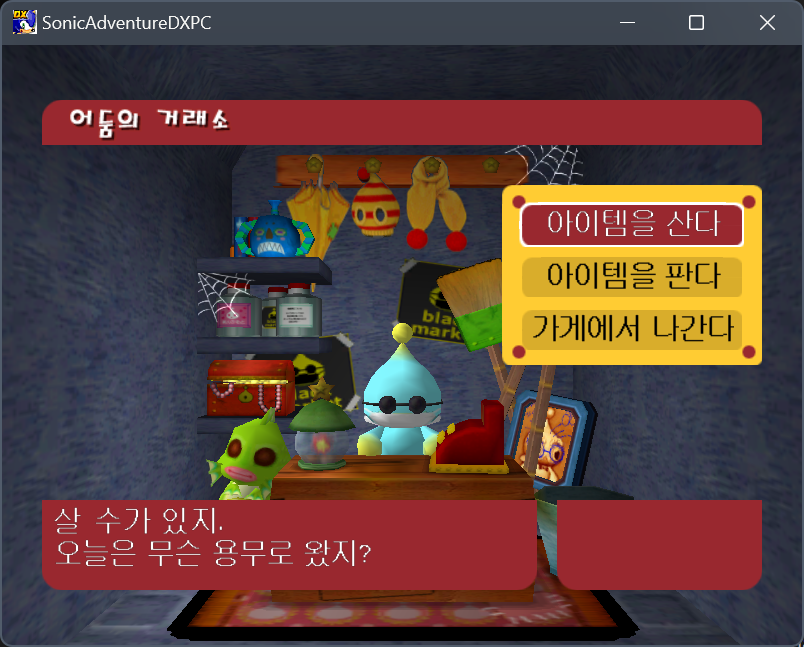
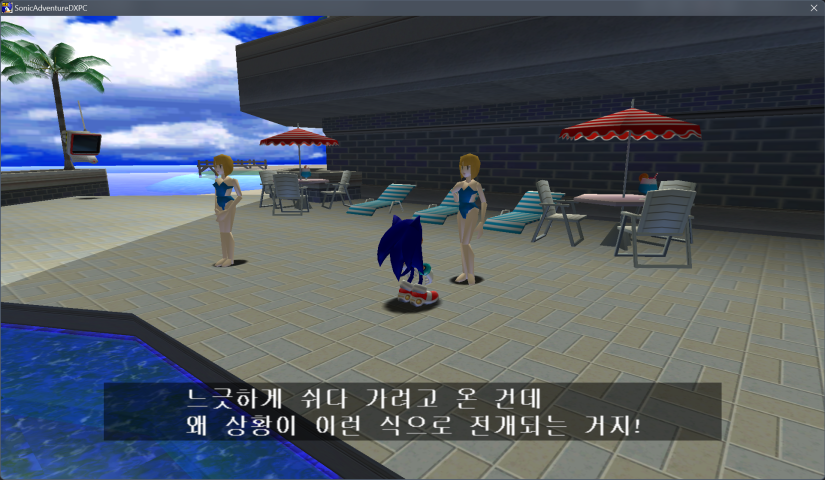
I can’t comment on the quality of the localization since I don’t read Korean, but I can say for sure a lot of work was put into it. Unlike French, Spanish and German translations that come with the US and Japanese versions, this one translates not only all textual data, but also all menu textures, the title screen and the main menu background. But the most impressive part is the Korean font used for subtitles and Chao Garden messages. To my knowledge, this is the only official release of SADX that introduces both asset and programming changes to accommodate a language that wasn’t in the original game. It’s also executed in an interesting way, which we will get to a bit later.
As amazing as this version is, it’s still the 2004 PC port of SADX at its core, so the game has terrible graphics with no mipmaps, broken windowed mode at non-4:3 resolutions, poor music quality etc. It’s pretty hard on the eyes, especially in motion.
(From now on, I’ll be using screenshots from the US version with the Mod Loader and the Korean mod)
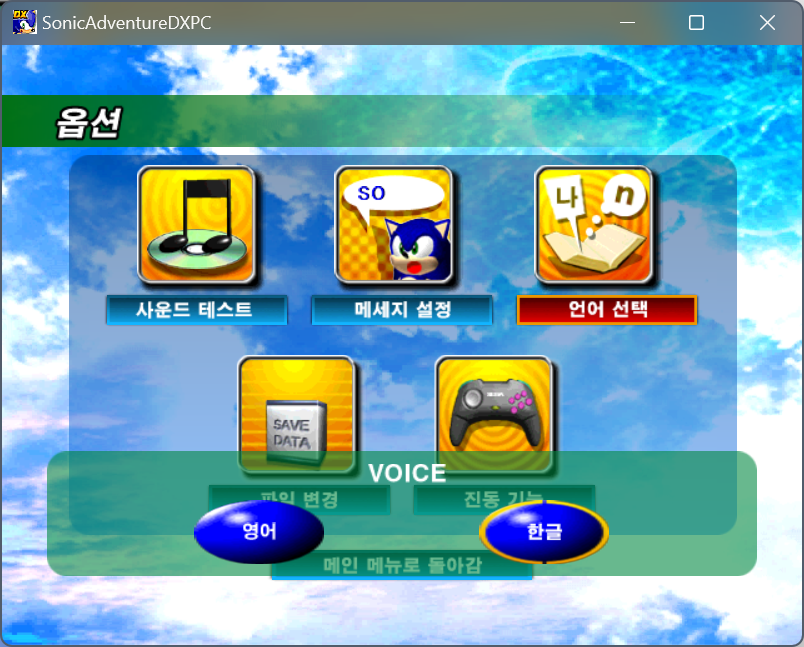
Korean localization and option menu differences
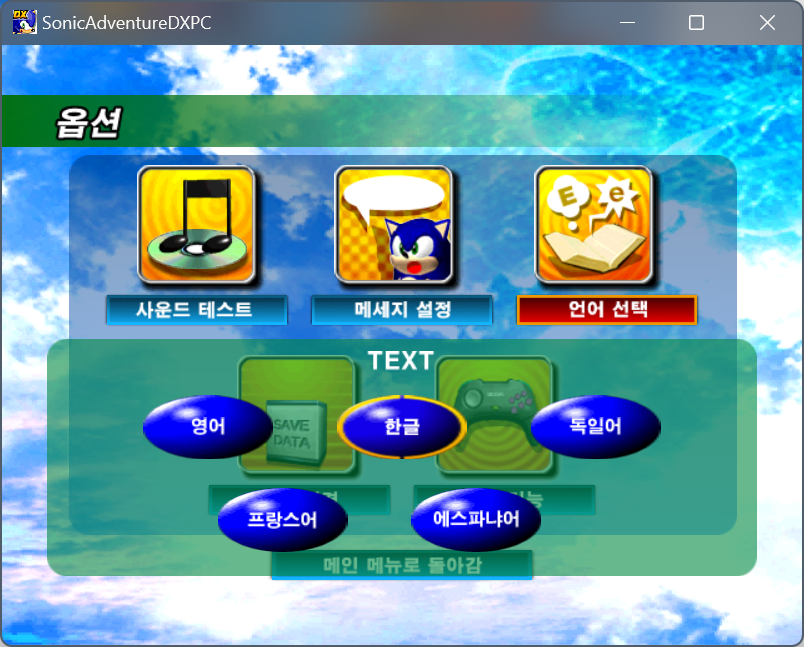
Korean text replaces Japanese in this version. English text is also available, although the title screen and the main menu background will always use the Korean versions of the textures. The game doesn’t let you pick Japanese voice language, so only English voices can be used. Interestingly enough, Japanese voices are still included with the game: it just doesn’t show the voice language setting in the options menu and overrides the voice language variable with English as soon as a save file is loaded. However, before a save file is loaded the game still plays the “Select a file” voice from the Japanese voices folder. To work around it, the developers replaced that voice with its English counterpart. The rest of the Japanese voices are untouched.
I’m not entirely sure, but I think such elaborate workarounds to make sure no Japanese is heard in the game may have had something to do with Korean laws regarding Japanese media, which were stricter when the game came out.
Funnily enough the texture for the option was still translated, so when you use the mod on the US version with the Mod Loader, you can select Japanese voices as if the option was intended to be there originally (although it says “Korean” instead of “Japanese”). You can also select other languages for text (not sure if you’d really need to if you’re playing this!), which the Korean version doesn’t let you do.
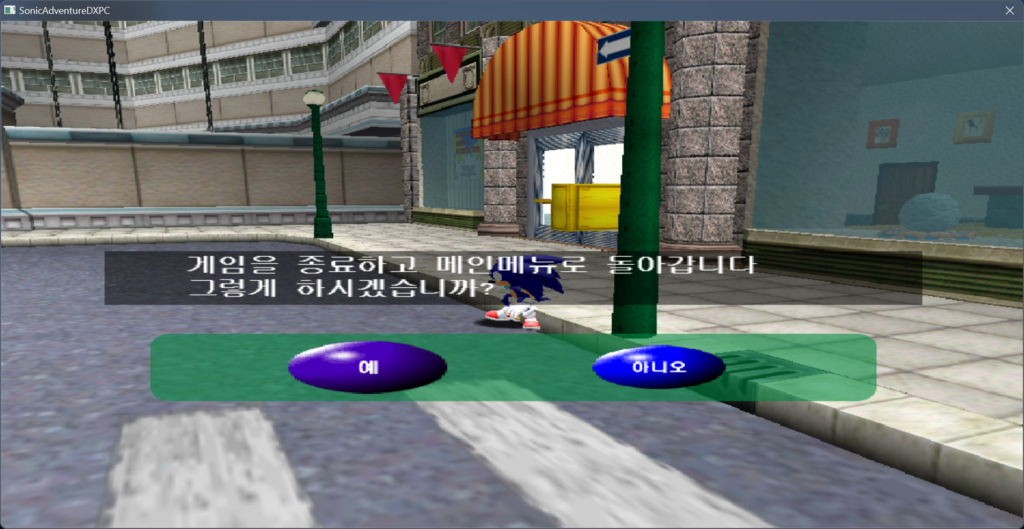
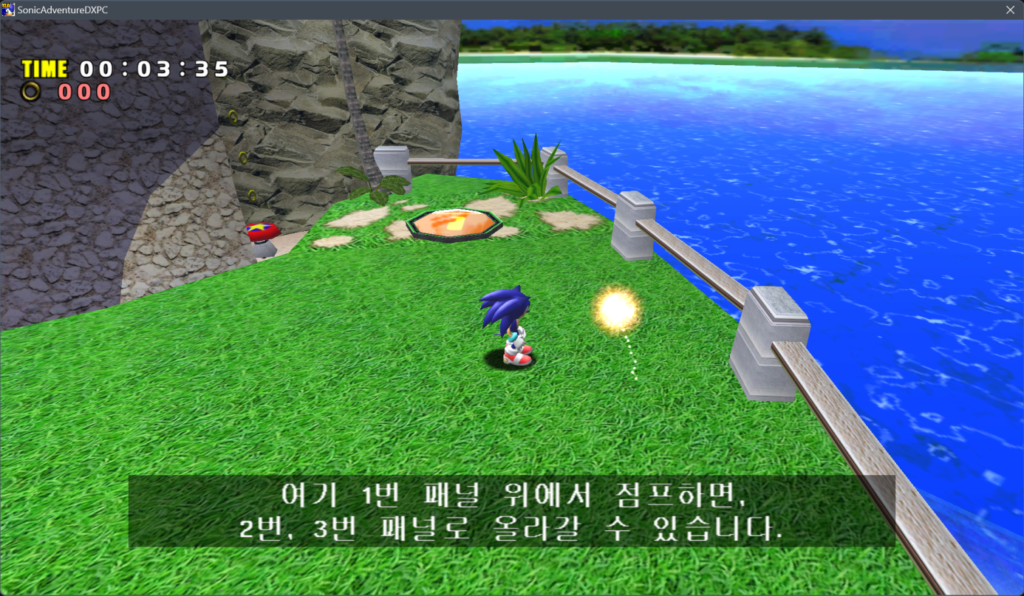
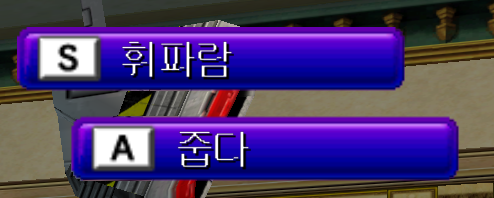
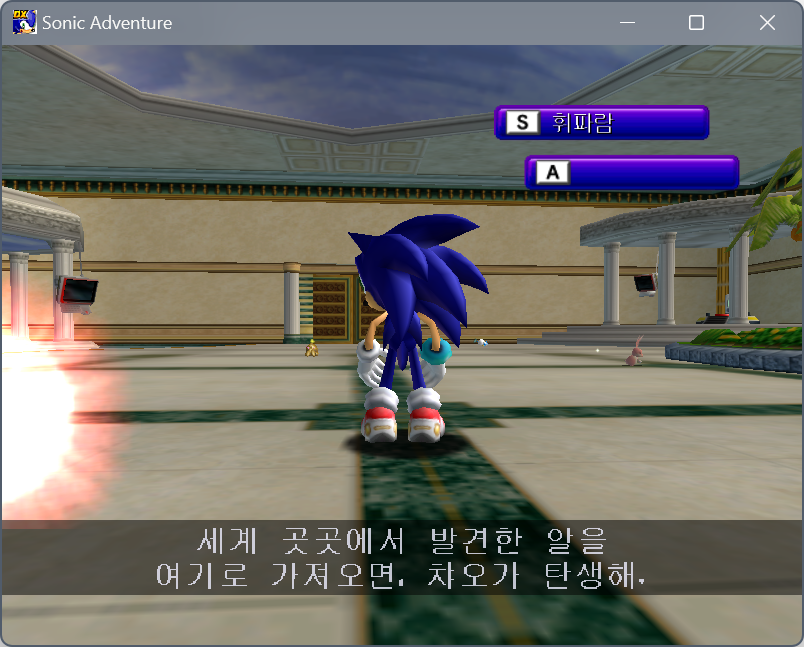
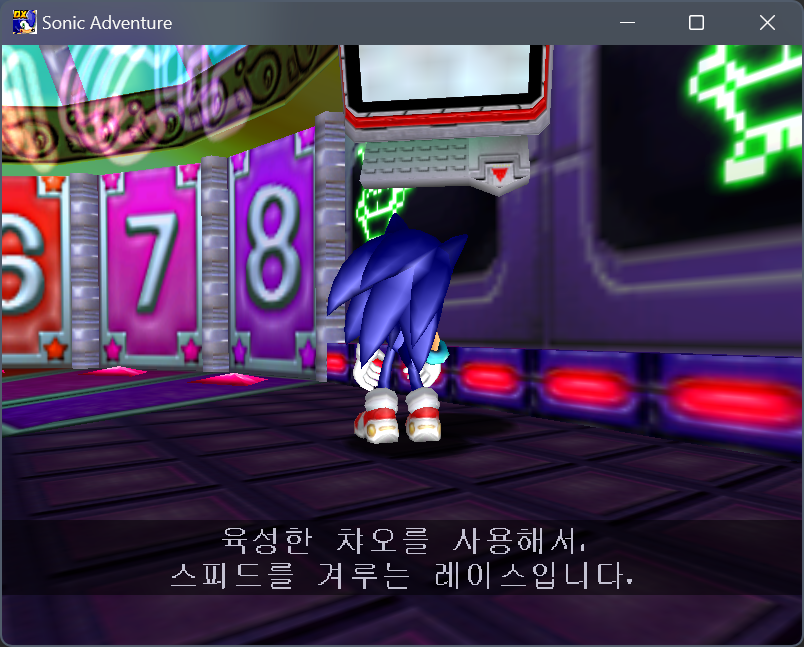
The localization has everything you’d expect, including character tutorials, Mini Game Collection etc.:
Reverse engineering the Korean font
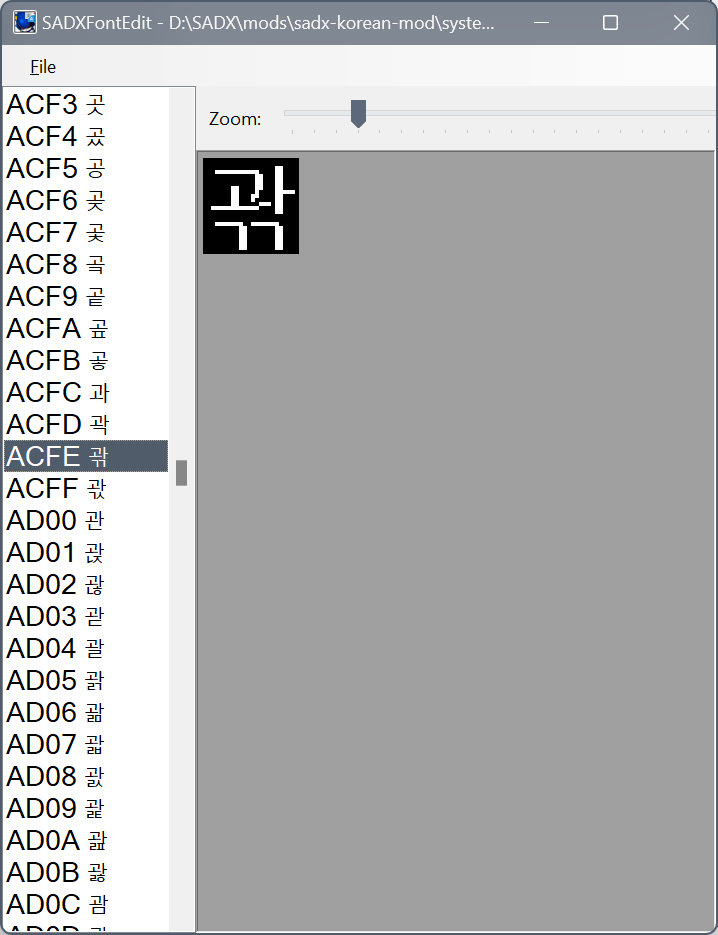
The implementation of the font used in the last two screenshots is intriguing. What caught my attention initially was the large size of the FONTDATA0.BIN file, which is used for Japanese characters in the original version (1.72MB vs 759KB in the original). My first guess was that they either replaced Japanese characters with Korean ones, or added them to the end of the file with the IDs matching the Korean codepage 949.
I started inspecting the file in SADXFontEdit in SA Tools. As expected, this file contains Hangul characters used to display Korean subtitles and Chao texts. However, apart from those, the file also has some characters from other languages, including Greek, Russian, Chinese and Japanese, which amounts to a total of 20609 characters (for comparison, the original file used for Japanese has only 8836, and almost all of those are Kanji, although Cyrillic and some other characters are present as part of the Japanese codepage). On top of that, soon I realized that character IDs stored in the file matched those of the codepage 1200 (UTF-16).
Yes, you read that right. In the Korean version of the game the subtitle font is an actual Unicode font. Although it only supplies specific blocks of the Basic Multilingual Plane, in theory you could add back the other blocks to implement any language included in the plane. Back in 2020 when I first discovered this, I updated SADXFontEdit with some new functionality, including support for the Unicode layout, so when you select the correct codepage you can see the matching character next to its ID.
As we know, the US and JP versions don’t support Unicode, so how does this work? The game’s dialog texts, menu prompts etc. were compiled into the game as strings encoded with the Korean codepage 949, not Unicode. However, when the game processes text data to create a subtitle texture, it parses the characters and assigns them Unicode IDs to be used to pick graphics from the font data you see in the screenshots above.
This was where I ran into an issue I didn’t understand at first. When I first ran the game, it would either display garbage text in place of subtitles, or just crash. That was how I found out that the Korean version required the system locale (language for non-Unicode programs) to be set to Korean for subtitles to render properly.
If the game already knows it’s converting Korean to Unicode, why does it need that? Eventually I found the answer when I was looking at the game’s font related functions in the disassembly that I quickly cobbled together. The Korean version uses the function MultiByteToWideChar to convert “C strings” (in this case Korean strings in the local codepage) to UTF-16 “wide strings”. It’s an interesting solution considering that other versions have a custom function to parse characters and assign font IDs to them.
So why does it fail when the system locale isn’t set to Korean? The developers call the function with the default first argument (0), which takes the current system locale as the source codepage. As a result, Korean text is converted to Unicode as if its original codepage is whatever you have set as the language for non-Unicode programs. If the developers of the Korean version set the first argument of MultiByteToWideChar to 949, the Korean version would display subtitles correctly on any system regardless of the locale. I think a lot of people would’ve never caught this issue because the game was meant to be sold only in Korea. Anyway, we can fix this on the mod’s side.
Implementing code differences
With such changes to the font system, simply replacing FONTDATA0.BIN in a mod wouldn’t make the game support Korean, and a bunch of hacks had to be done first. One thing to do was to introduce calls to MultiByteToWideChar before letting the game parse text data. As I didn’t know the stuff I explained in the previous paragraphs, it took me a while to realize the importance of these calls, and my initial attempt to get the game to display Korean text correctly were unsuccessful. I gave up on the mod for a while, and it was only this month that I gave it another try and figured it out. Another necessary change was in the function that maps character IDs to bitmap data in the font file. There were overrides for … , 「 and 」, but other than that it was pretty straightforward.
I put together a DLL mod that replaces three text-related functions, then I replaced one Japanese hint message in Emerald Coast to test it. The Mod Loader used a hardcoded codepage for strings that are normally in Japanese, so I added global codepage overrides for all languages, which can now be used by other mods.
At first I wasn’t sure how far I could go with this, but when I finally saw the Mod Loader display Korean text, making a Korean mod started looking feasible. I was also driven by the technical challenge and the uniqueness of this version of the game, support for which required several changes to our tools, which I was happy to implement.
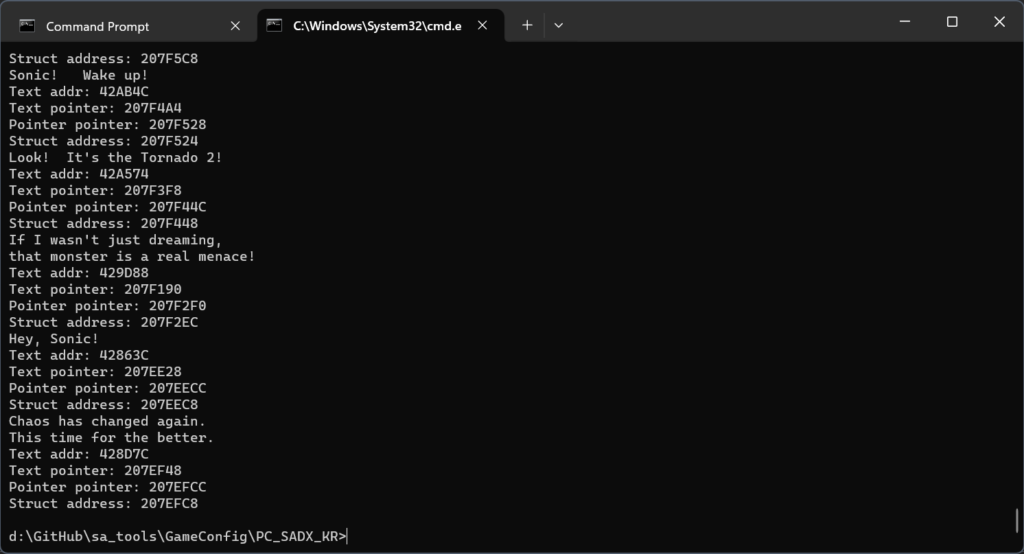
Extracting and importing Korean text
Speaking of technical challenges, obviously I had to somehow extract all Korean text from the game and put it into the mod. Finding it all manually was out of the question, which was part of the reason I gave up on the mod last time. However, after my experience with matching assets between different versions of the game, I was tempted by the idea of automatic splitting. Since the game still has English text, it’s possible to scan the EXE to find it, and then work up the structures to get to the start of each item. There were three types of data that had the largest amount of text: cutscene text, Tikal hints and multi-language strings such as character unlock messages, menu prompts etc. I put together a program to make the task easier. Basically it created an INI file for SA Tools’ split tool to extract the text from the Korean EXE. Of course some manual tweaks were required to ensure all addresses were correct, but the program did most of the tedious work. Cutscene text in particular required almost no touch-ups because I made it verify the text in other languages to ensure it’s the same entry in both games.
Building a mod from this data in SA Tools was a challenge. I had to add custom codepage support and fix a few bugs, but mod building in the tools is more stable now and the end result was worth it.
At this point I ran into an issue many retranslation mods had to deal with. There was some text in the game that wasn’t supported by the Mod Loader and/or the SA Tools at the time. It’s still possible to replace such text in a DLL mod, but I wanted all text replacement to be done via the Mod Loader’s INI-based system, so I had to do some work on the tools again. I added support for the following data types, which can now be replaced in mods without code:
Tikal hints that show up after you die on a boss. These are different from the hints you see in stages, and they’re stored in different ways depending on the boss, so I had to improvise a bit to make them rippable in the tools and replaceable in the Mod Loader.
Mission descriptions for Mission Mode.
Mission Mode tutorial text.
Single language strings, such as unlock prompts for Game Gear games or Metal Sonic. I added them to the SA Tools a couple years ago but not to the Mod Loader.
Multi-language strings, such as character unlock messages or “Welcome to Twinkle Circuit!”. Same as above.
Implementing Chao texts
With all that in place, all Korean text in the game was finally transferred. There was one big obstacle remaining: Chao texts. Although it loads the same font data, the Chao text system in SADX uses completely different code from the system used by subtitles and menu prompts, probably because it was copied from SA2B and duct taped with the SADX font system. So I had to do the same thing I did for the subtitles for the Chao text functions. This was probably the most difficult part of the whole mod. The functions involved with SA2B text were all difficult to hook, and even when I managed to replace them correctly I would only get crashes. It took me a long time to get a working decompilation of the functions that convert strings for the SA2B system. I’d like to thank Kell for a decompilation of these functions in the US version, which I used for reference.
Interestingly enough, the Chao system also uses wide strings internally, but all text is stored in the Japanese codepage, or Korean in this case. The game performs conversion from C strings to wide strings just the same, but the Korean version uses MultiByteToWideChar again instead of the simple parsing function used for Japanese in the original version.
After many hours of debugging I finally figured out the error in my decompiled code that was related to finding character data. In the pseudocode I got by decompiling the Korean version, the cell ID of the character data in the font was calculated by adding 0x776A to the character ID, which made it go out of range. The sign had to be flipped to make it subtract 0x8896 instead. After I fixed that, the text started working.
Now the mod was ready for testing. Out of curiosity I tried it with Dreamcast Conversion and realized that the Dreamcast Chao Garden hints were missing. Luckily they were translated in the Korean version, so I added them to SA Tools, made some changes to DC Conversion to make it more compatible with mods that replace them, and reimported the translated hints. I was happy that even the normally unused Dreamcast hints were translated.
The mod is compatible with Dreamcast Conversion, but with a few quirks. Since there are no Dreamcast menu textures in Korean, Dreamcast Conversion’s replacement of some GUI textures will be undone by this mod. This is a quick fix, and I might update it with proper compatibility eventually. There may be bugs in the mod, particularly crashes. Please send me crash dumps if you run into any.
For obvious reasons HD GUI is incompatible. If you’re interested in making HD Korean textures and an HD Korean subtitle font, please let me know.
This is the first translation mod that works by replacing the Japanese font, and the first to modify font-related code. I hope this release attracts more Korean players to SADX modding and helps other translation mods. I also think it’s truly amazing that after all these years of research and reverse engineering there are still new things about this game waiting to be discovered.
The SADX Mod Installer was discontinued back in 2022. However, with the arrival of the new SA Mod manager and retirement of the original SADX Mod Manager I felt it was necessary to update it. Many people are still using it, and Linux/Steam Deck tutorials seem to rely on it. Although I want to retire the installer as soon as possible, I made the following update to make it easier for people using it right now:
If you’re running Windows 7 or above, it will install the new SA Mod Manager (auto picking x86 or x64). If you’re running Windows XP, it will install the legacy SADX Mod Manager.
.NET 7.0 Desktop (x86 or x64) is installed automatically on Windows 7 and above.
The installer was made compatible with Windows XP. All tools, including Steam conversion, are completely functional on XP. Online functionality will not work on XP and 7 due to outdated certificates, but it might work if the system has correct certificates.
The Steam conversion process has been altered to rely on patches. Now the installer doesn’t supply the EXE or DLLs from the 2004 version, instead it patches the Steam version to turn it into the 2004 US version using a 5MB diff file. This was made possible thanks to HDiffPatch. Best Buy, EU original, Sonic PC Collection and Korean versions of SADX are also patchable.
The installer still doesn’t support the new configuration format introduced in the new Mod Manager, and I think it will probably stay that way. However, the new Mod Manager picks up the old format settings generated by the installer so this should be no problem to the players.
At some point in the future the new Mod Manager will handle the Steam conversion, and the installer will no longer be necessary. Some of its features will be implemented in the new Mod Manager or through other means: for example, Guide Mode could be done as a web page with 1-click install links.
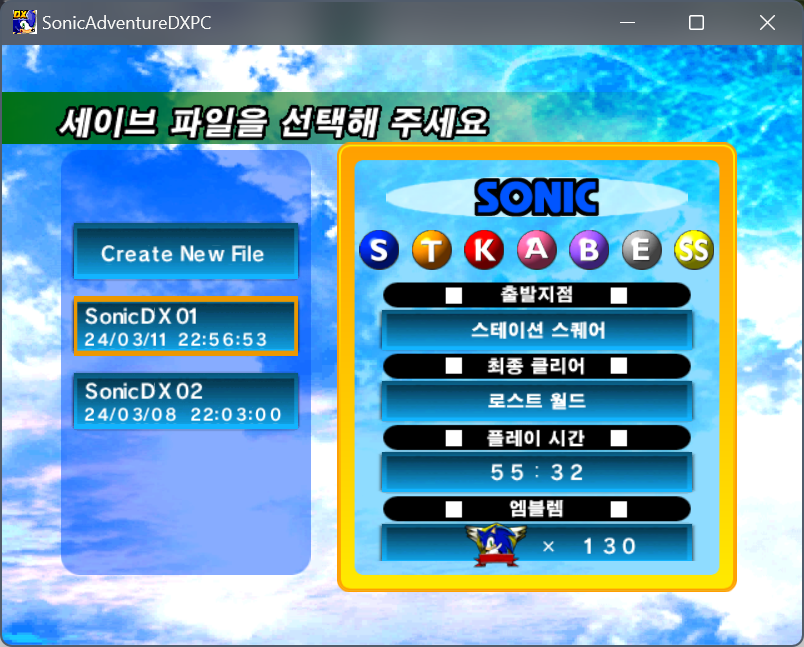
Previously you had to use BetterSADX or the SADX Mod Installer to transfer savegames to the 2004 version, but soon it will be possible to load the Steam version’s saved games in the Mod Loader. You will be able to load files directly from their original location, so no transfer is required whatsoever. If you play a Steam saved game in the modded 2004 version, the original Steam version will also be able to load it, so you can play the same file on both versions. The Chao Garden save is also supported: if you load a saved game located in the Steam folder, it will use the Steam version’s garden file. As you can see in the screenshot, custom filenames (ANSI/English only) are also possible, so your saved games no longer have to be named “SonicDX??” for the game to recognize them.
The format used for saved games is almost identical between the two versions, but there are a couple differences that make them incompatible. You can load 2004 saves in the Steam version if you rename them, but not the other way around. The files created by the Steam version are 16 bytes bigger (1408 bytes vs 1392 in the old port), and 12 of these extra bytes are used to store the file creation date and time. At the beginning of the file there is a checksum, and both versions use the same algorithm which calculates the checksum value based on the contents of the whole file. The reason the 2004 version won’t load Steam saved games is because the game only accounts for 1392 bytes when reading the file and calculating the checksum, which doesn’t match because it doesn’t include those extra 16 bytes in the calculation. The Steam version removes the checksum check on the file select screen so it recognizes saved games from the 2004 version, although the date and time might look wrong. When progress is saved in a file that originally came from the Steam version, the Mod Loader writes the current date and time into the file so it should display correctly in the Steam version as well.
Dreamcastify, a website that documents SADX downgrades, was having some technical issues throughout the last two years. Some video comparisons that were hosted on Youtube were taken down, and after a WordPress update the pages didn’t load properly and many images were missing. I reworked all pages so that they load again and made the following changes:
All video comparisons are now hosted on the site itself.
The pages display smaller JPG images by default, and a full-size PNG version of each image can be seen if you click on the preview. This made the site much more responsive.
There were some minor text edits (mostly wording) and some info updates regarding mods and emulation.
The feedback section was removed. Sorry, I don’t have the resources to read all of the comments. I haven’t looked at the newly arrived 850+ comments for about 3 years now, and from a quick glance they seem to be just spam anyway.
This is likely the last update to the site for the observable future. I was originally going to take it down because I didn’t have interest in updating it anymore, but then I thought it should be left online as a source of information, so I took a weekend to sit down and fix it for good, as well as rewrite some things.
I’d like to thank KGL for getting the initial editing and format updates done.